
2.4 Gather Field Data with ArcGIS Collector
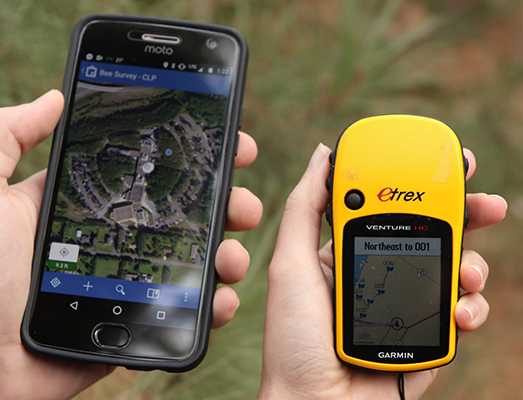
Field data collection typically involves marking waypoints and tracks on a mobile GPS receiver, and writing down observations or attribute values on a paper data sheet. GPS-enabled smartphones and tablets now enable more efficient, all-in-one field data collection (Figure 2.15). Esri’s ArcGIS Collector app, available for Android and iOS, sends location and attribute data collected on a mobile device directly to ArcGIS Online. The data can be seamlessly integrated into ArcGIS Pro to create maps that update themselves in real time as new field data is collected. This section demonstrates how hosted feature layers are used to gather field data through the Collector app and make it available for use in any GIS application.
Section Outcomes
In this section, you will:
- Create a new hosted feature layer in ArcGIS Online,
- Add and configure attribute fields,
- Adjust layer settings,
- Configure a web map for data collection,
- Test and refine the web map,
- Use Collector for ArcGIS to collect field data, and
- Add the hosted feature layer to an ArcGIS Pro project.
![]() Teachback 8 – Goal
Teachback 8 – Goal
 Create a new hosted feature layer in ArcGIS Online
A hosted feature layer is a vector feature collection stored in the Content area of ArcGIS Online that allows others to interact with it when added to a web map. A new hosted feature layer must be created for storing the field observations to be gathered with ArcGIS Collector.
1. In a browser, go to ArcGIS.com.
2. In the upper-right corner of the web page, click “Sign In”. Enter your ArcGIS Online organizational account credentials.
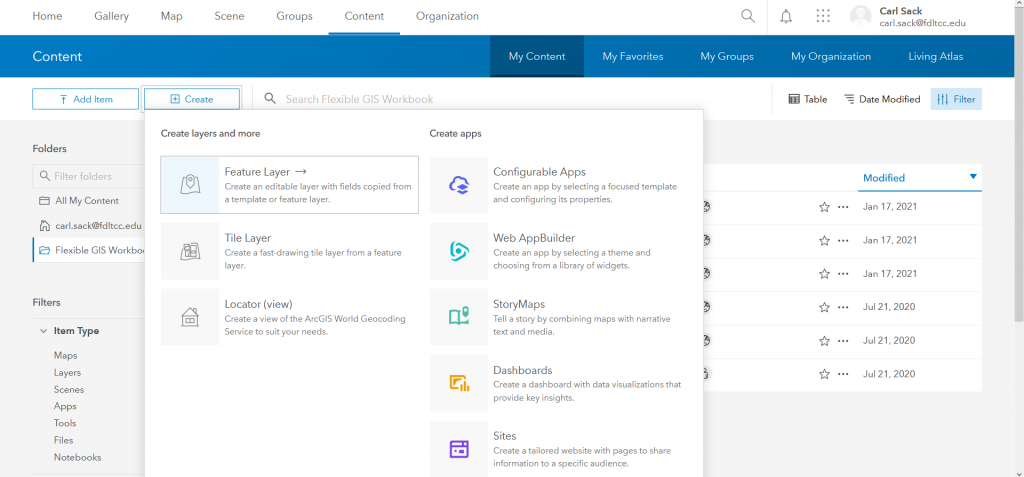
3. In the menu bar at the top of the Home page, click “Content”.
4. On the left side of the page, just below the blue header bar, click “Create”, then click “Feature Layer” (Figure 2.16).
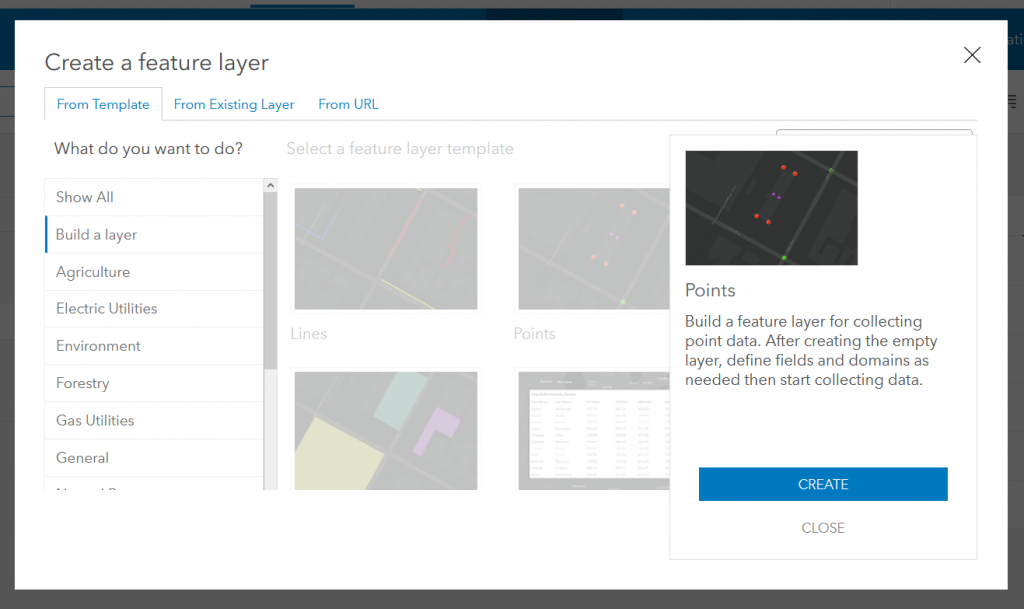
5. In the Create a feature layer window, on the left side menu, click “Build a layer”.
6. In the main part of the window, under “Select a feature layer template”, click on “Points”, “Lines”, or “Polygons” depending on the dimensionality of the field data you plan to collect (see your answer to Teachback 8). Most field observations are collected as point locations, so if you’re not sure, select “Points”.
7. Click “CREATE” (Figure 2.17).
In the lower part of the Create a feature layer window, there are two checkboxes: “Capture GPS receiver information” and “Z values – coordinates include z values to store 3D data”. The first checkbox adds fields to the layer that automatically record metadata from the GPS receiver in the mobile device used to capture data, including the accuracy of the recorded position and sources of position error. Checking this box will add quite a few fields to your feature layer, so it best to only do so if you plan to perform very precise surveying. The second checkbox automatically stores altitude data from the GPS receiver with the feature coordinates. Only check this box if vertical position is important to the type of field data you are collecting (for example, if you are working in a mountainous area, and the elevation of each observation is meaningful).
8. Check one or both checkboxes if desired; if you are unsure, leave them unchecked. Then click “Next”.
9. Pan and zoom the map to focus on the geographic area where you plan to collect your field data, then click “Next”.
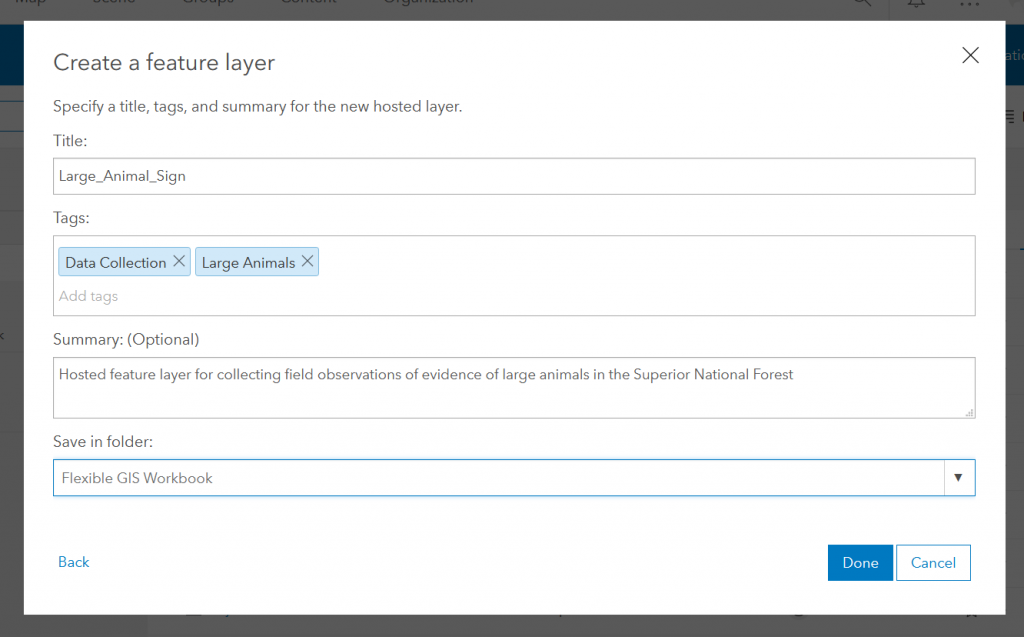
10. Enter a title, tags, and summary for the feature layer, and choose a content folder in which to save it (if any are available), then click “Done” (Figure 2.18).
Add and configure attribute fields
Once you have created a new hosted feature layer, you need to add fields to the layer’s attribute table for observations that you intend to make about your collected features. It is better to be exhaustive and add fields that may only be relevant sometimes than to not add enough fields and realize later on that you need to record additional attributes (you can come back and add more fields later if needed, though).
You must specify a data type for each field you add. You have other options as well, including whether the field will require a value to be entered, whether the value for each feature must be unique, whether the value can be edited, whether there is a default value, and the maximum length of the value. You can also specify a list of values that are valid for a given field. The changes you make here will determine what information can be entered for each new feature created in the field.
![]() Teachback 9 – Intention
Teachback 9 – Intention
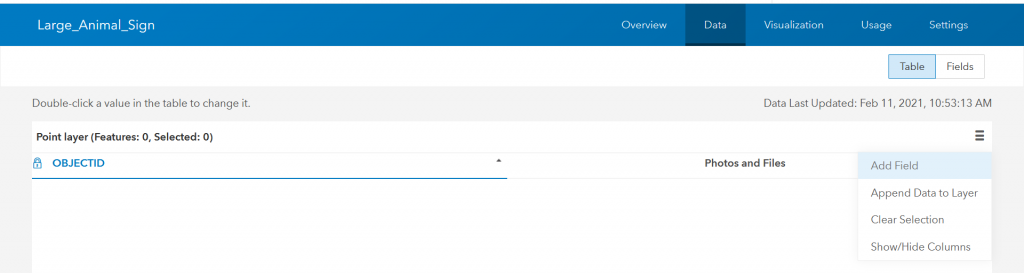
11. In the blue menu bar near the top of the item description page, click “Data”.
12. In the upper-right corner of the table, click the Options button (which looks like three stacked horizontal lines), then click “Add Field” (Figure 2.19).
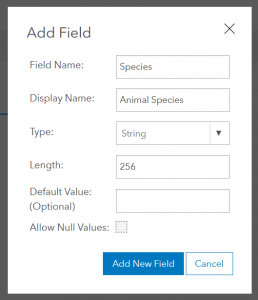
13. In the Add Field window (Figure 2.20):
1. Add a Field Name that is 10 characters or fewer, with no spaces or special characters.
2. Add a Display Name, which can be longer and have spaces.
3. From the “Type” dropdown, select the data type:
-
-
-
- String: for text or any mix of numbers, letters, and other characters
- Integer: for whole numbers
- Double: for numbers with decimals
- Date: for dates and times.
-
-
4. If the data type is String, specify a maximum number of characters for values in the “Length” input.
5. If desired, add a Default Value. This is a value that will be automatically added for each feature unless the user changes it.
6. If each new feature should require a value for the field, uncheck “Allow Null Values”. If filling in the field should be optional, leave it checked.
7. Click “Add New Field”.
14. Repeat Steps 12 and 13 to create all of the additional fields that are needed for the layer, as you specified for Teachback 9.
15. Above the table, on the right side of the page, click “Fields”.
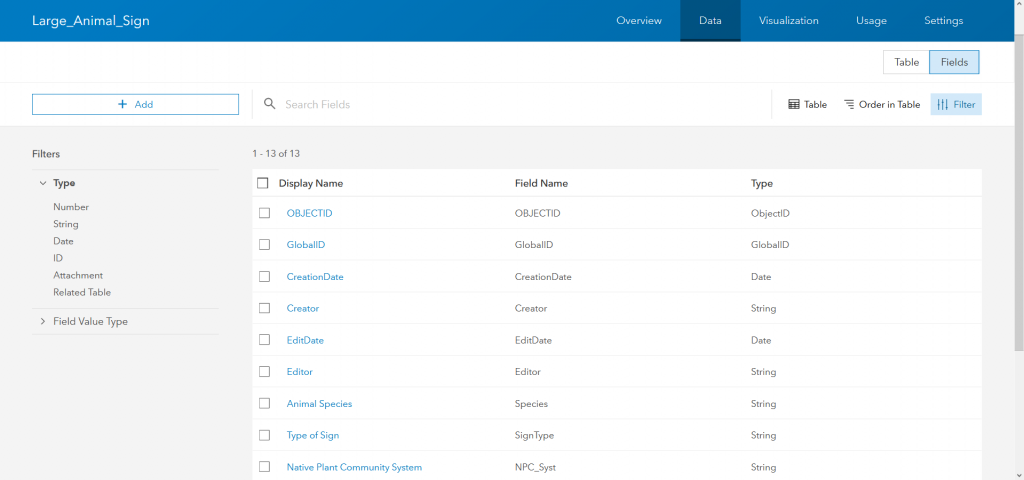
16. Click on the display name of the first field you added (you may have to scroll down if you cannot see the field right away).
17. In the upper-middle of the page, to the right of the “Description” header, click “Edit”. Add a description for the field and click “Save”.
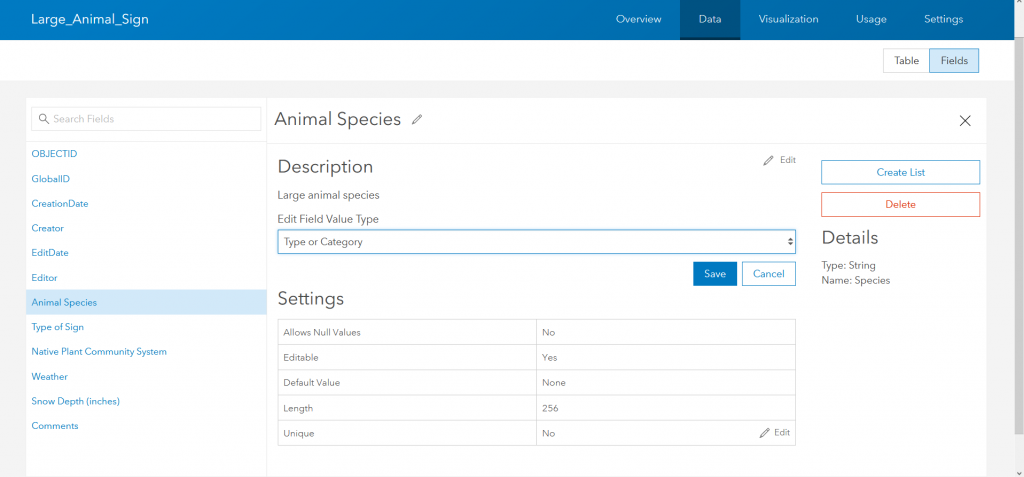
18. To the right of the “Field Value Type” header, click “Edit”. From the dropdown, select the field value type that best matches the types of values that the field will store (Figure 2.22).
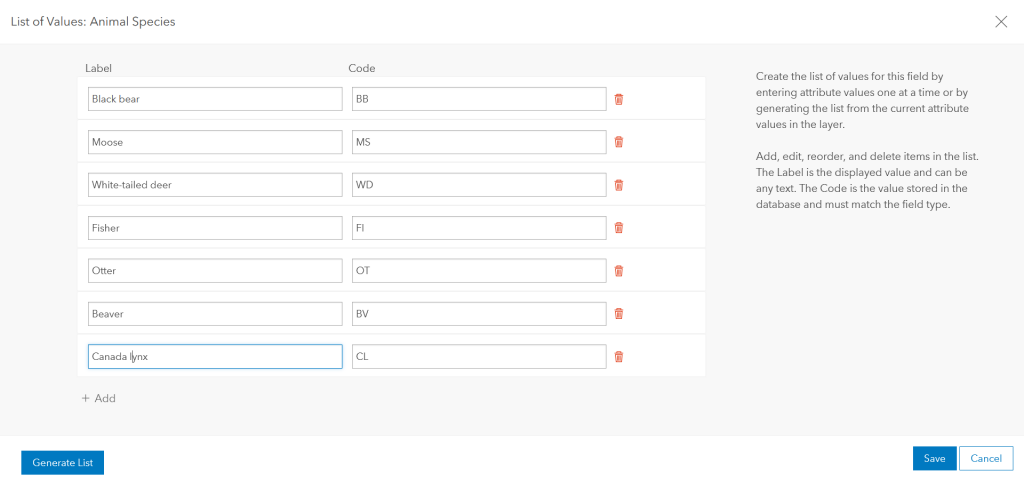
19. If the attribute values for the field should be chosen from a list of specific values:
1. On the right side of the page, click “Create List”.
2. Under “Label”, type what should be displayed for the first value.
3. Under “Code”, type a code for the first value. This can be the same as the label, or something shorter.
4. Click “Add” and fill in the label and code for additional values to add them to the list (Figure 2.23).
5. When finished adding values, click “Save”.
20. In the list of fields on the left side of the page, click the name of the next field you added.
21. Repeat steps 16-19 for all of the attribute fields you added to the table.
Adjust layer settings
With hosted feature layers, you can control who has permission to access and edit the layer, and what types of editing other people can do. It is important to consider who will have access to your data and how much power you want to give other people over it. Will you allow others in your organization or members of the public access to the layer? Do you trust others who will have access to the layer to edit or delete existing features? Should they be able to edit their own features once they have created one? The more people have access to editing your data, the more carefully you should think about restrictions that will maintain the security and integrity of the data. No matter what settings you choose, you are the administrator of the layer and will always have the ability to modify and delete it, and it will not appear in anyone else’s ArcGIS Online content area.
22. In the blue menu bar at the top of the page, click “Overview”.
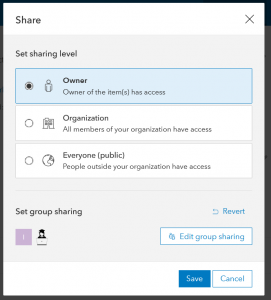
23. On the right side of the page, at the bottom of the list of action buttons, click “Share”.
24. Choose whether to maintain exclusive access to the layer, or give access to others in your organization or the general public. If you are a member of one or more groups within the organization, you will see an “Edit group sharing” button that allows you to choose which groups to share the layer with. Make the appropriate selections and click “Save” (Figure 2.24).
25. In the blue menu bar, click “Settings”.
26. Scroll down to the “Feature Layer (hosted)” area. Examine each option and decide whether to maintain the option as is or change it.
![]() Teachback 10 – Perception, Interpretation, and Evaluation
Teachback 10 – Perception, Interpretation, and Evaluation
Configure a web map for data collection
Once your hosted feature layer is set up and ready to receive field data, the next step is to create a web map to allow for data collection. Any web map with an editable feature layer that you have been given access to, including those you create yourself, will appear in ArcGIS Collector when you are signed in with your organizational account. The web map configuration determines the basemap that will be used, how features in the layer will be symbolized, and what fields will be shown on the data collection form. The web map can be created in ArcGIS Online using the Map Viewer or Map Viewer Beta apps. As of this writing, Map Viewer is the default web mapping interface in ArcGIS Online, so these directions are specific to it.
27. In the blue menu bar at the top of the page, click “Overview”.
28. On the right side of the page, at the top of the list of buttons, click “Open in Map Viewer”.
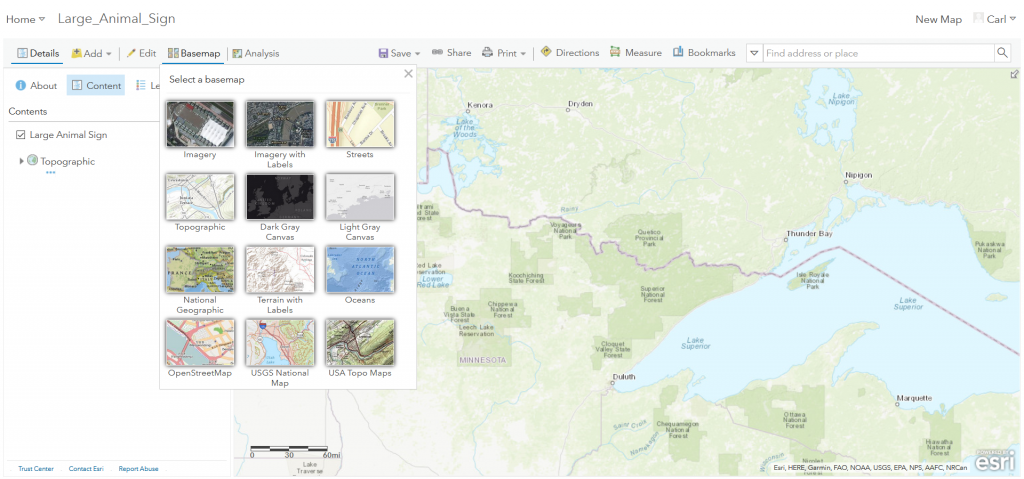
29. In the toolbar, toward the left side, click “Basemap” and select a basemap that you want to display while collecting field data (Figure 2.25).
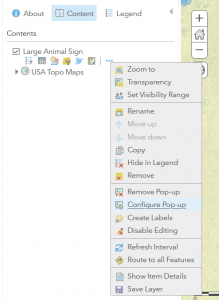
30. In the Content pane on the left side of the page, hover over the name of the hosted feature layer to reveal the layer option icons, then click the three dots to the right of the other icons (“More Options”), then click “Configure Pop-up” (Figure 2.26).
31. In the Configure Pop-up pane, under the list of attributes, click the “Configure Attributes” link.
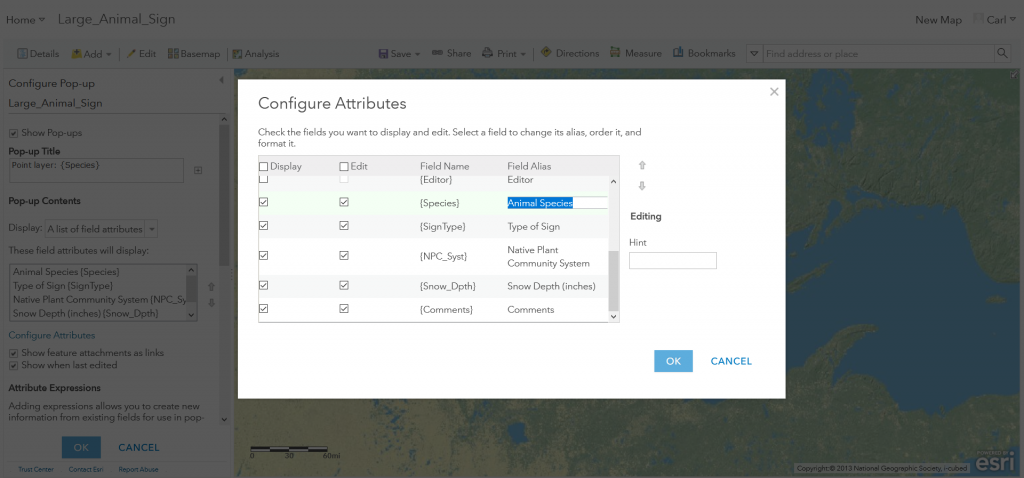
32. In the Configure Attributes window, scroll down, review which fields are selected for viewing and editing, and adjust as needed. Fields with their “Edit” box checked will be made available on the input form when a new feature is added in Collector. You can also edit each Field Alias by clicking on the current alias. The Field Alias will be displayed in the pop-up and Collector form. Click “OK” when finished (Figure 2.27).
33. At the bottom of the Configure Pop-up pane, click “OK”.
34. In the Content pane, hover your mouse over the feature layer name, then click the “Change Style” button (which looks a circle, square, and triangle of different colors).
35. In the Change Style pane, under “(2) Select a drawing style”, in the “Location (Single symbol)” box, click “OPTIONS”.
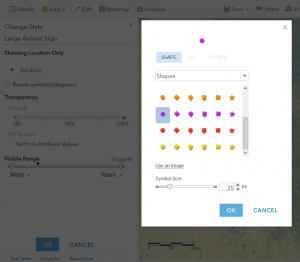
36. Under “Showing Location Only”, click “Symbols”.
37. Choose a symbol and adjust its size to your liking, then click “OK” (Figure 2.28).
38. At the bottom of the Change Style pane, click “OK”, then click “DONE”.
39. In the toolbar, click “Save”, then click “Save”.
40. In the Save Map window, enter a Title, Tags, and Summary, then click “SAVE MAP”.
Test and refine the web map
Before using your map in Collector, it is a good idea to test it in your browser by creating dummy features. This allows you to see what the data entry form will include and how the features you collect will appear on the map. You can adjust the basemap, pop-ups, and symbolization to your liking, then delete your test features.
41. Zoom in as far as possible on an area where you will collect data in the field.
42. In the toolbar, click “Edit”.
43. In the Add Features pane, click “New Feature”.
44. Click a random spot on the map to place a test feature. If your hosted feature layer is a line or polygon layer, continue clicking on the map to draw the feature, and double-click to finish it.
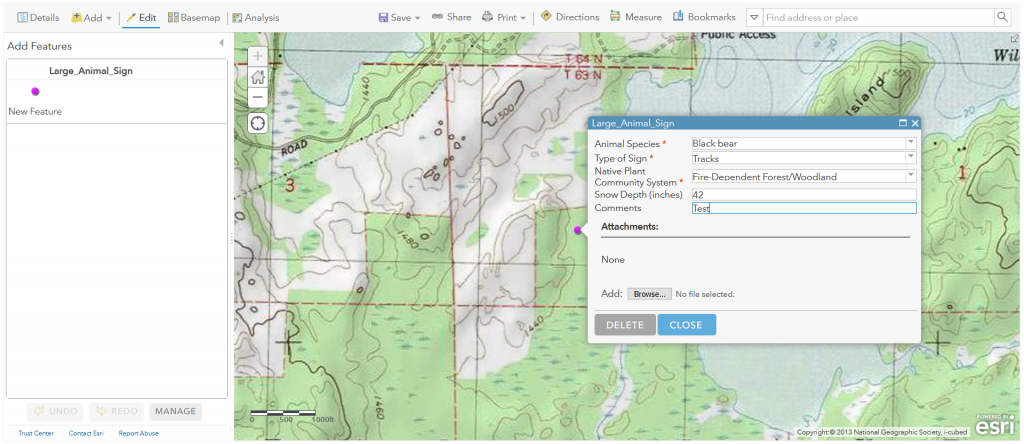
45. In the feature pop-up, fill in the attribute fields, then click “CLOSE” (Figure 2.29).
46. In the toolbar, click “Details”.
47. Make any changes you like to the basemap, pop-up configuration, and layer symbolization, then click “Save→Save”.
48. Click the test feature you placed on the map to open its pop-up.
49. At the bottom of the pop-up, click “Edit”.
50. At the bottom of the editable pop-up, click “DELETE”.
Use Collector for ArcGIS to collect field data
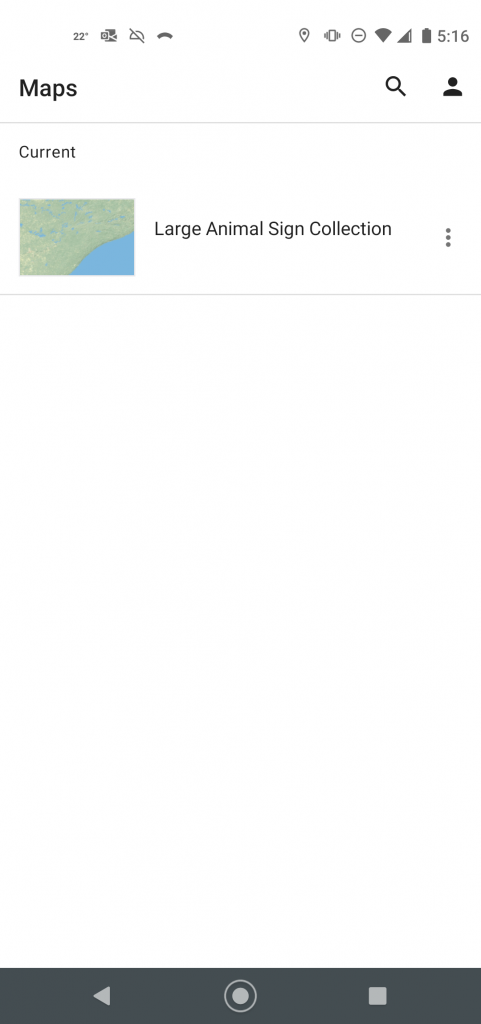
Your saved web map should automatically appear in the Collector app once you have logged in using your ArcGIS Online organizational account credentials. The Collector user interface is highly intuitive. If you will collect data on a device that does not have access to cell data or in an area that may not have cell signal, you can save the part of the map where you will be working for offline use. The offline map can be set to automatically sync to ArcGIS Online once your device resumes an internet collection.
51. On a mobile device (cell phone or tablet), if necessary, download and install ArcGIS Collector from Google Play (Android) or the App Store (iOS). There is no cost for the app.
52. Open ArcGIS Collector on your mobile device.
53. Tap “Sign in with ArcGIS Online” and sign in with your organizational account credentials.
54. Tap the Options button (the vertical line of three dots) to the right of the thumbnail image of your map, then tap “Add offline area”.
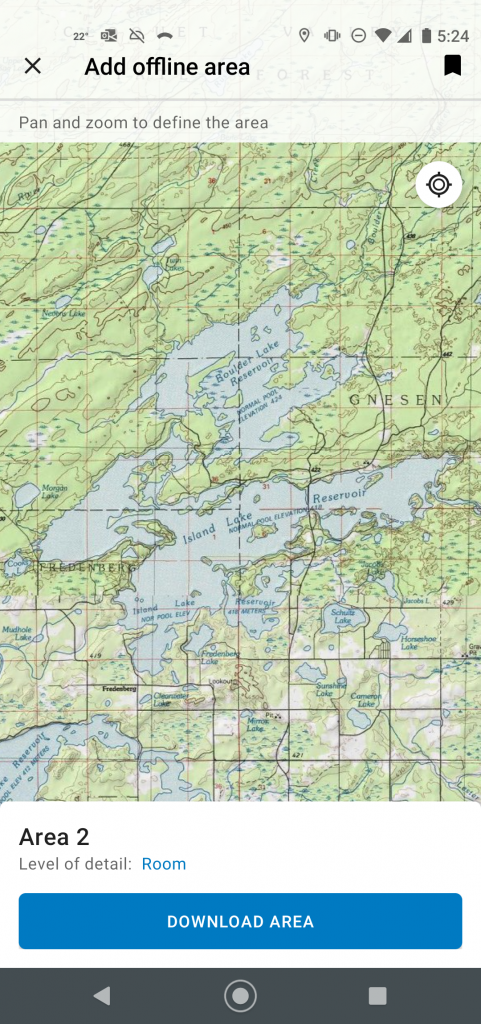
55. Zoom and pan the map until it covers just the area in which you will be collecting field observations. Limit the extent of the area as much as possible; the larger an area you download, the more device storage will be used by the map.
56. Tap the “DOWNLOAD AREA” button (Figure 2.31).
57. When the download completes, tap the Options button to the right of the area name, then tap “Rename area”.
58. Enter a new name that fits the area and tap “OK”.
59. Tap on the area name to open the map.
60. Go to an area within the extent of the offline map where you will collect field data.
61. Tap the blue + button in the lower-right corner of the map to add an observation point.
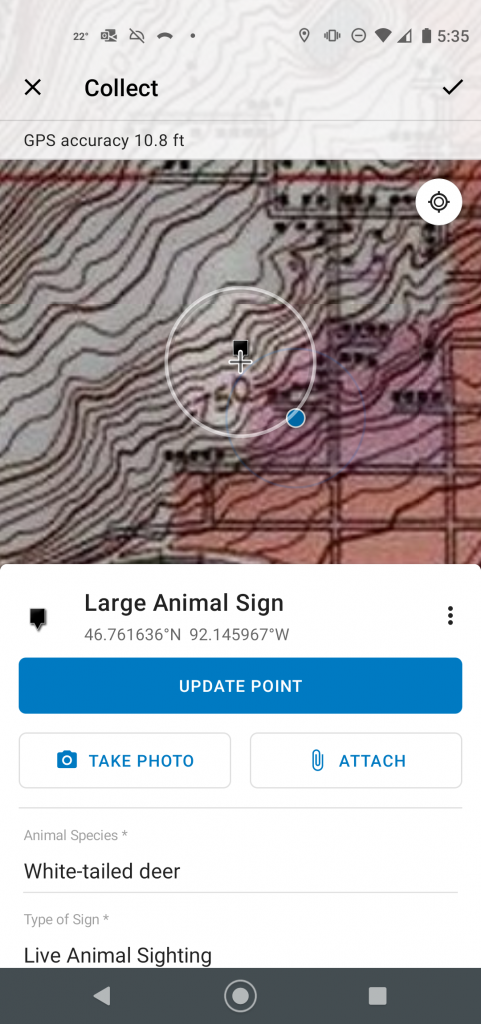
62. Adjust the position of the marker if necessary by panning the map and tapping the “UPDATE POINT” button.
63. Swipe up on the layer name (above the UPDATE POINT button) to expand the data form.
64. Tap on each required form field and choose or type in a value.
65. If desired, tap the “TAKE PHOTO” button to add a photo of the site.
66. When finished, tap the checkmark in the upper-right corner of the screen.
67. Collect additional data as desired.
68. When back in a location with internet access, tap the Sync button (which looks like a circle composed of two arrows) at the top of the map, then tap “SYNC”. You can turn on Auto-sync to avoid having to do this again if you want.
69. Exit the app.
![]() Teachback 11 – Evaluation
Teachback 11 – Evaluation
- Why is it necessary to add an offline area before collecting field data?
- Describe what happens to the data you collect after you add an observation.
Add the hosted feature layer to an ArcGIS Pro project
Now that you have collected some data in your hosted feature layer, you can easily add the data to a map in ArcGIS Pro. You can then symbolize and perform analysis on the layer as needed.
70. Open an existing ArcGIS Pro project or create a new project from the Map template.
71. In the Map ribbon tab, click the “Add Data” button.
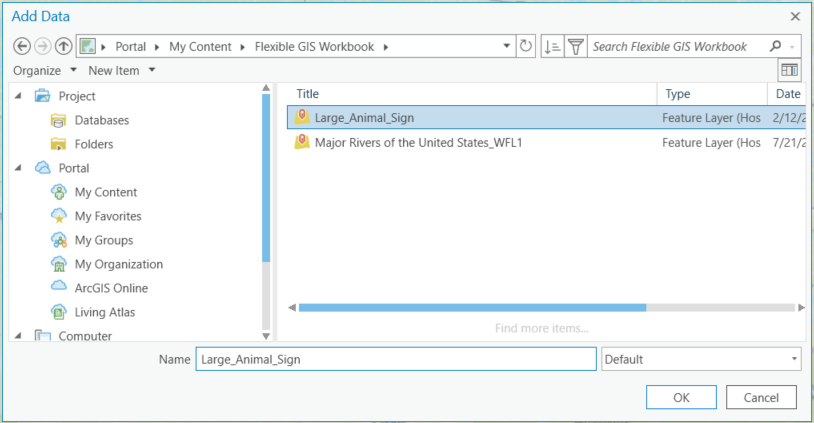
72. In the Add Data window, on the left side, expand “Portal” and click on “My Content”.
73. Find your hosted feature layer in the main part of the window, click on it once, and click “OK” to add it to the map (Figure 2.33).
74. Zoom the map in on the features contained by the hosted feature layer.
75. In the Contents pane, expand the hosted feature layer and its sub-layer.
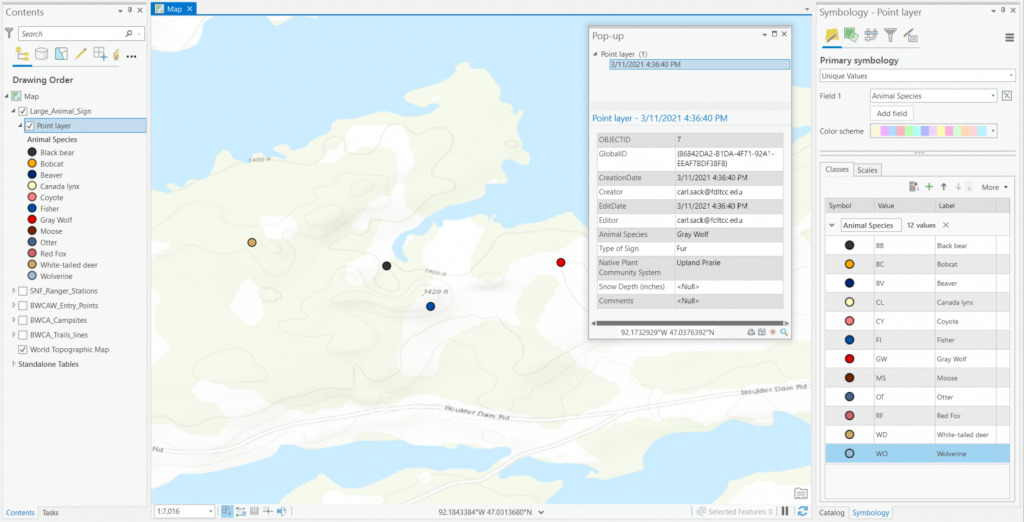
76. Right-click the name of the sub-layer, then click “Symbology”.
77. Adjust the layer symbology as desired and save the project (Figure 2.34). (If you need a refresher on working with layer symbology, see Section 1.4).
Further Resources
A shared property of features in a geospatial dataset with different values for different features or pixels, represented as a column in the dataset's attribute table
A vector feature layer stored in ArcGIS Online that can be used and interacted with on web maps
A column in an attribute table, representing one attribute in a geospatial dataset
Information about data or a map, possibly including its source, author(s), included attributes, dates, scale, coordinate reference system, projection, etc.
The type of values for an attribute, such as boolean (yes/no), text, integer (short or long), float (single- or double-precision), or date/time
