
2.1 Import GPS Data
One of the easiest and most common ways to create new geospatial data is using a mobile GPS receiver unit. GPS stands for Global Positioning System, and is a global navigation satellite system operated by the United States government that provides real-time position and time information anywhere on Earth. A GPS receiver captures orbital position and time information transmitted by four or more orbiting GPS satellites and uses this data to calculate its own geographic position in latitude, longitude, and altitude coordinates. For more information on how GPS works, visit the GPS.gov website.
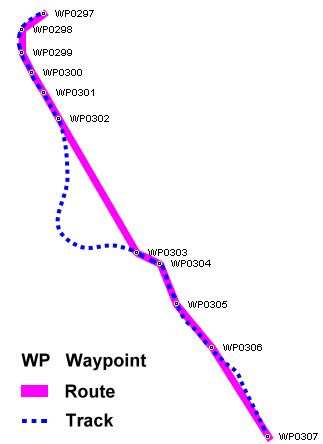
GPS receivers can record their position for later reference in three ways: as waypoints, routes, and tracks (Figure 2.1). Waypoints are point locations defined by a set of latitude, longitude, and altitude coordinates, along with a name and description given by the user. Routes are pre-defined paths created from waypoints or points of interest located from map software on the GPS receiver. Tracks are sequences of points called trackpoints, which are recorded automatically by the GPS receiver at regular intervals of time or distance. For example, a GPS receiver might be programmed to record a trackpoint every 50 feet. Tracks are thus similar to breadcrumb trails, and can be transformed into vector line features by GIS software.
Section Outcomes
In this section, you will:
- Import GPS waypoints into an ArcGIS Pro project,
- Import GPS tracks into an ArcGIS Pro project, and
- Convert imported trackpoints to lines.
 Import GPS waypoints into an ArcGIS Pro project
GPS data is stored in GPX format, a human-readable format that can be opened and viewed in a text editor. In order to be used in a GIS project, data collected with a GPS receiver unit must first be converted to a native GIS format, such as a shapefile or geodatabase feature class. In ArcGIS Pro, this can be done using a geoprocessing tool called GPX to Features.
If you are using waypoints and tracks that you collected with a GPS receiver unit yourself, copy the data from the receiver unit to a GIS data folder on your computer before proceeding. Refer to your GPS unit’s documentation for instructions on copying the data to your computer. If you downloaded or were given GPX files from somewhere else, place them in your GIS data folder before proceeding.
1. Open ArcGIS Pro and create a new map project. See Section 1.1 if you need a refresher on how to do this.
2. In the Catalog pane, add a new folder connection to your GIS data folder. See Section 1.3 if you need to review how.
3. In the Analysis ribbon tab, click the “Tools” button to open the Geoprocessing pane.
In ArcGIS Pro, the Geoprocessing pane gives you access to many tools that manipulate and analyze geospatial data. You will make use of this pane a great deal in the coming chapters.
4. In the search bar at the top of the Geoprocessing pane, type “GPX” (Figure 2.2).
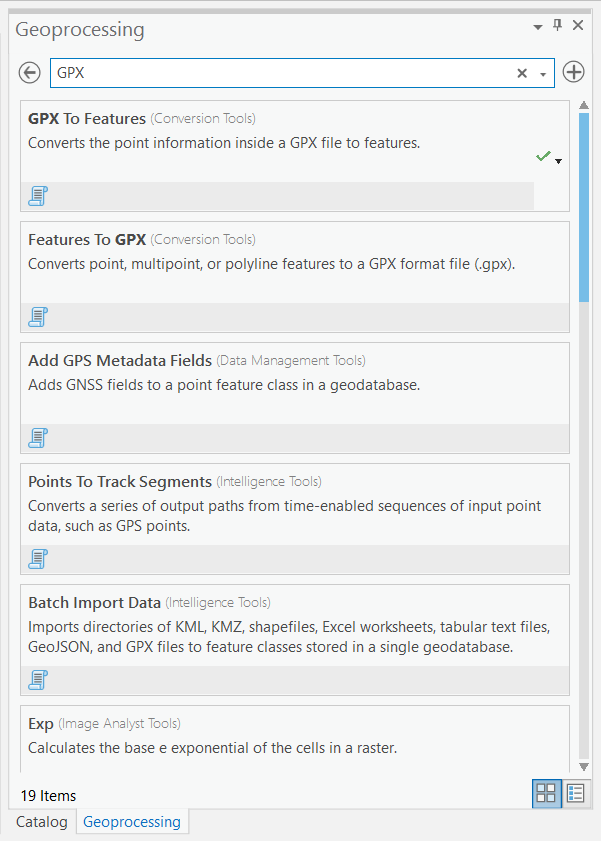
5. Click on the box of the first result, “GPX to Features”, to open the GPX to Features tool.
6. On the right side of the “Input GPX File” field, click the Browse button (which looks like a folder icon).
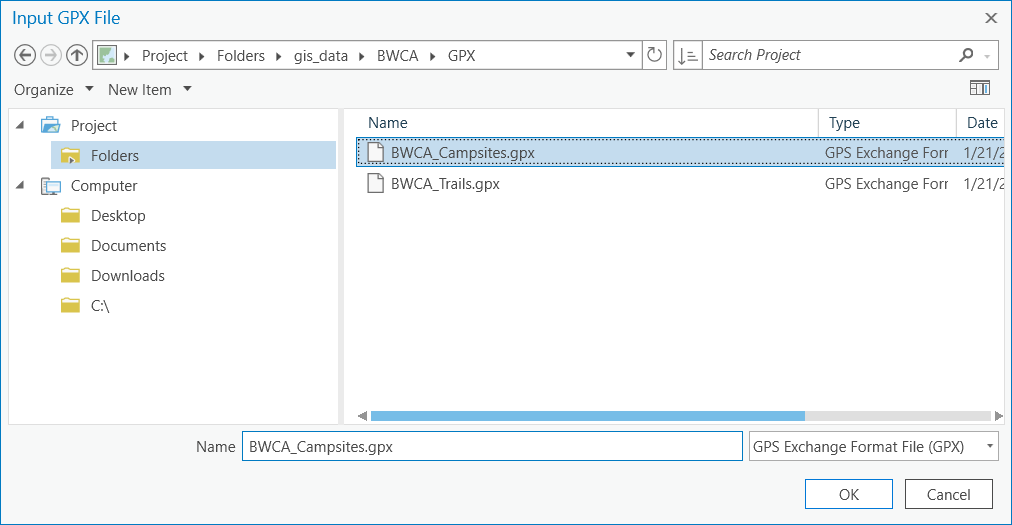
7. In the Input GPX File window, on the left side, under “Project”, click “Folders”.
8. Navigate to the .gpx file in your GIS data folder that contains the GPS waypoints, then select the file and click OK (Figure 2.3).
9. In the Geoprocessing pane, on the right side of the “Output Feature class” field, click the Browse button.
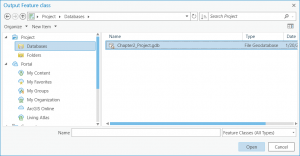
10. In the Output Feature class window, on the left side, under “Project”, click “Databases” (Figure 2.4).
Every ArcGIS Pro project includes a geodatabase created specifically for that project. The geodatabase is a convenient container for datasets that will be used in the project. Vector datasets within a geodatabase are called feature classes. Using a geoprocessing tool to transfer data to the project geodatabase preserves the original dataset in the GIS data folder for future use in other projects.
11. In the right side of the window, double-click the project geodatabase; or click on it once, then click “Open”.
12. In the “Name” field, give your output feature class a suitable name with no spaces (you can use an underscore character, “_”, in place of spaces), then click the “Save” button.
13. At the bottom of the Geoprocessing pane, click the “Run” button.
14. If a Catalog tab is visible at the bottom of the right pane, click it. If not, click the View ribbon tab, then click the “Catalog View” button.
15. In the Catalog pane, expand the “Databases” item, then expand the project database.

Import GPS tracks into the ArcGIS Pro project
16. Return to viewing the Geoprocessing pane by clicking the Geoprocessing tab at the bottom of the right pane; or in the Analysis ribbon tab, click the “Tools” button.
17. If necessary, reopen the GPX to Features tool.
18. Repeat the process you followed previously to import the GPX file with tracks as a new feature class in the project geodatabase.
Teachback 2
- With the Explore tool active (in the Map ribbon tab), click on one of the imported waypoint features on the map to bring up its pop-up. What attribute information does it contain?
- Click on one of the imported trackpoint features on the map to bring up its popup (which may also list surrounding trackpoints). What attribute information does it contain?
- What is different about trackpoints versus waypoints?
Convert imported trackpoints to lines
As you can see from the previous output, the GPX to Features tool only converts GPS tracks into trackpoints, without connecting the points as vertices in line segments. To create lines out of tracks, you need to use a separate ArcGIS tool, the Points To Line tool.
19. In the Geoprocessing pane, at the top, click the back button to return to the tool search bar; or, in the Analysis ribbon tab, click the “Tools” button again.
20. In the Geoprocessing pane search bar, search for “Points To Line”, then open the Points To Line tool.
21. In the Geoprocessing pane, hover your cursor over the blue question mark icon in the upper-right corner of the tool interface, then hover over each blue “i” icon that appears to the left of each input field when you move your mouse over the field.
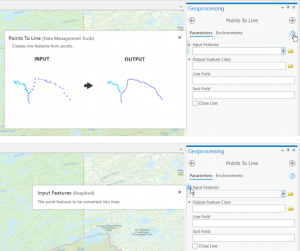
22. For “Input Features”, choose the map layer containing the imported trackpoints.
23. Under “Output Feature Class”, browse to the project geodatabase and enter a suitable name for the line feature class.
24. Under “Line Field”, choose “Name”.
25. If one of the options under “Sort Field” is a time or date-time field, choose it; otherwise leave the input blank.
26. Leave “Close Line” unchecked, and click the “Run” button.
![]() Teachback 3 – Evaluation
Teachback 3 – Evaluation
Further Resources
A computer chip or device that receives signal from global positioning system satellites to provide geolocation and time information
A global navigation satellite system (GNSS) operated by the United States government that provides publicly available, real-time geolocation information anywhere on or near Earth
A system that uses a constellation of satellites to provide geospatial position information to users anywhere on or near Earth. As of 2021, there are four operational GNSSes: GPS (operated by the United States), GLONASS (operated by Russia), BeiDou or BDS (operated by China), and Galileo (operated by the European Union).
A point location recorded by a GPS receiver as a set of latitude, longitude, and altitude coordinates
A pre-defined path programmed into a GPS receiver unit using waypoints or other points of interest
A sequence of point locations recorded automatically by a GPS receiver at regular intervals of time or distance
GPS exchange format, an XML-based data format commonly used to store waypoints, routes, and tracks on GPS receiver units
A geographic file format for spaghetti-model vector features that consists of between 3 and 12 separate files per feature collection
A collection of geospatial vector features stored in an Esri file geodatabase
A GIS software operation that manipulates or analyzes geospatial data
An Esri proprietary database container format designed to hold geospatial data and topology rules
A shared property of features in a geospatial dataset with different values for different features or pixels, represented as a column in the dataset's attribute table
