
1.2 Navigate the Map
This section will walk you through the basics of how to find your way around the Map view. The map is the most important part of any GIS project, because it visually displays the geographic information that is included in the project. Maps help us make sense of the world through the power of visualization. Before you add anything to your map, start by getting to know your way around the basemaps that ArcGIS Pro provides.
Section Outcomes
In this section, you will:
- pan and zoom the basemap to fine-tune the map view,
- create a spatial bookmark,
- change the basemap,
- zoom to a named place, and
- zoom to a set of coordinates.
 Pan and zoom the basemap to fine-tune the map view.
1. Make sure ArcGIS Pro is maximized and the Map tab is active in the ribbon.
2. Hover your mouse over the Explore button to see an explanation of how to use mouse buttons and shortcuts to change the map view.
3. Use your mouse to zoom and pan the map until you can see the street you live on.
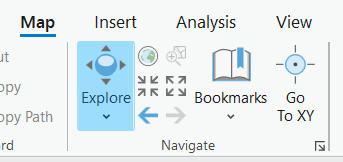
4. Use each of the active small buttons between the Explore and Bookmarks buttons in the Navigate tool group (Figure 1.5). You can also hover over each one with your mouse to see a tooltip describing its purpose.
![]() Teachback 5 – Perception and Interpretation
Teachback 5 – Perception and Interpretation
In your own words, describe what each of the mouse actions and small ribbon buttons did to the map view.
In the lower-left corner of the map view is a representative fraction scale (Figure 1.6). Review the concept of map scale and how a representative fraction displays scale in Section 2.2 of the Campbell and Shin text, then proceed with the next three steps and answer Teachback 6.
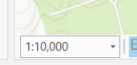
5. Use the dropdown arrow to the right of the representative fraction to adjust the map scale a few times in each direction.
6. Click on the representative fraction, type any number, and hit the Enter key on your keyboard.
7. Use the Navigate tools to zoom the map in and out and observe what happens to the representative fraction.
![]() Teachback 6 – Perception and Interpretation
Teachback 6 – Perception and Interpretation
- Describe what happens to the Map view when you type a larger number for the representative fraction, and what happens when you decrease it.
- How does zooming in and out change the representative fraction?
Create a spatial bookmark.
8. Use whichever navigation techniques you prefer to zoom the map until it matches the area described in your project goal (which you wrote for Teachback 1) as closely as possible.
9. In the Navigate group of the ribbon’s Map tab, click the Bookmarks dropdown button (shown in Figure 1.5), then click “New Bookmark…”.
10. Add a name and description for the area of your bookmark, then click “OK”.
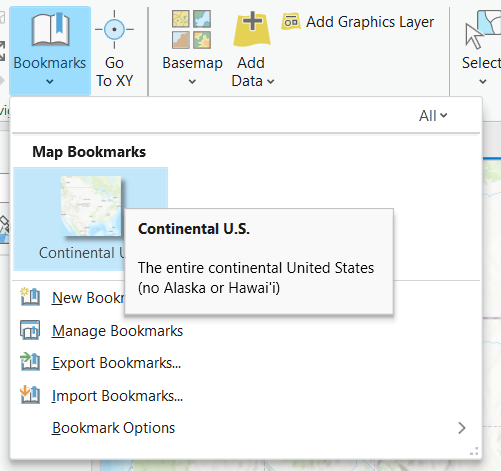
11. Click the Bookmarks button again. You should now see a map tile for your bookmark above the bookmark options. Hover over it with your mouse to see the bookmark description (Figure 1.7).
12. Zoom to somewhere else on the map, then click the Bookmarks button and select your bookmark.
13. Click the Bookmarks button, then “Manage Bookmarks”. Explore the options in the Bookmarks pane.
14. Click the Bookmarks button, then hover your mouse over the other options in the dropdown menu to see what each one does.
![]() Teachback 7 – Evaluation
Teachback 7 – Evaluation
Describe a few ways you think bookmarks could be useful when working on a GIS project.
Change the basemap.
The basemap is what you see in the Map view before you have added any of your own datasets to the map. This map is made up of a set of images—called map tiles—that are not stored on your computer, but rather sent to ArcGIS Pro through the internet from ArcGIS Online. Because of this, you need an internet connection to see the basemap, and it will not appear if you are working offline. As you have already seen, you can also turn the basemap off by unchecking its layer in the Contents pane.
Esri provides several different basemap options, which are the same for ArcGIS Pro and ArcGIS Online. You can change the basemap using the Basemap dropdown in the Layer group of the ribbon’s Map tab (Figure 1.8).
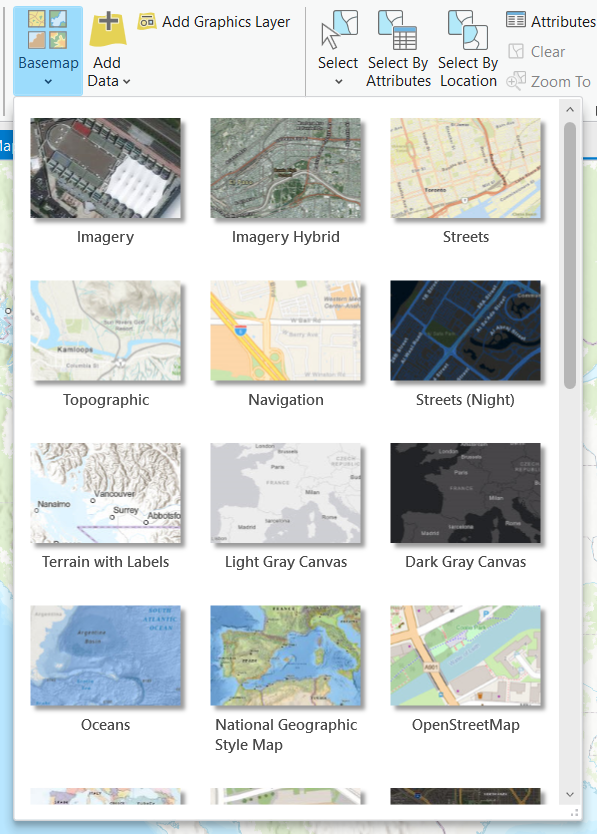
15. In the Layer group of the ribbon’s Map tab, click the Basemap dropdown button, then choose “Imagery”.
16. Zoom the map to the place you live, zooming in until the quality of the image deteriorates. Try to find the smallest object in the image you can still recognize.
17. Switch the basemap to “Imagery with Labels” and slowly zoom out.
18. View the other basemaps, observing how each one is designed to include different features and display them in different ways.
Teachback 8
Some basemaps have more information on them than others. Choose one basemap (other than Imagery or Imagery with Labels) that contains a minimal amount of information and one that contains a lot of information to explore. What types of geographic features are shown on one but not the other? What features are shown on both? For those that appear on both, what is different about how these features are shown on each map?
Zoom to a named place.
You are probably familiar with the search bar in commonly used web maps and map apps (such as Google Maps or Apple Maps). ArcGIS Pro also has a simple location search feature that can come in handy when you are trying to zoom to a specific named place.
19. In the Inquiry tool group of the ribbon’s Map tab, click the Locate button (which looks like a pair of binoculars). The Locate pane opens in the right pane. Note that there are now two tabs at the bottom of the pane: an inactive Catalog tab and an active Locate tab.
20. In the search bar within the Locate pane, begin typing the name of a place you would like to search for. As you type, a dropdown should appear with matching options, with the best match at the top (Figure 1.9).
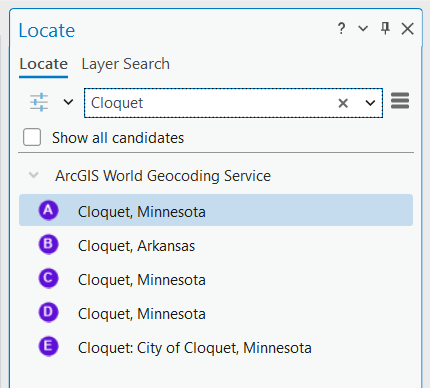
21. In the list of matches, double-click the place that you were looking for to zoom to it, or right-click it, then click “Zoom To”.
Teachback 9
- What were the top 5 matches when you searched the name of your place?
- Did you add other information besides the placename to the search bar, such as its county, state, or country? If you search just the placename without any of this additional information, how many matches appear?
Help! It didn’t work! What now?!
Sometimes tools in ArcGIS Pro don’t do what you expect them to. For years, I was unable to use the Locate tool because the ArcGIS Online World Geocoding Service—the data source that the tool queries to find places—simply wasn’t there.
When you run into a problem like this—and you will!—it may be tempting to throw your hands up and declare that this software just doesn’t work right, or it’s too complicated for you to understand, or maybe you just don’t have the tech smarts to do GIS after all. But even pros sometimes struggle with complex software. The key to solving these sorts of problems is to put your sleuth hat on and go to the internet to look for answers. Here are some really useful sleuthing resources:
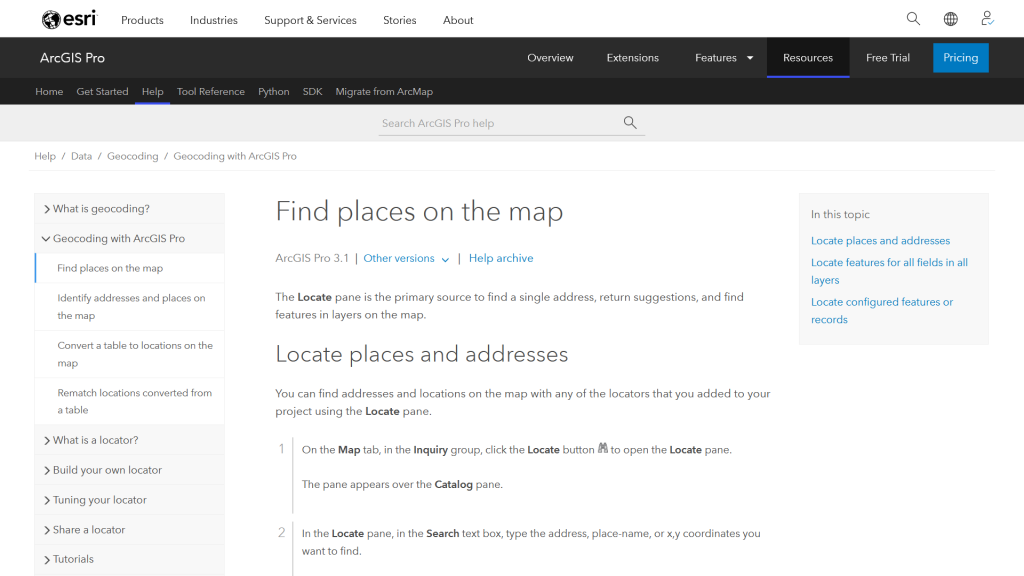
- ArcGIS Pro Help: When something doesn’t work as expected, a good first step is to read through the documentation or help file for the tool on the ArcGIS Pro website. There is at least one very descriptive page with step-by-step directions for every tool and procedure in the program. Browse the expandable table of contents on the left side of the page, or try searching for the tool by name or a description of what it does. The path through the website to each page is shown above the page title and table of contents. In this case, the Locate tool is described in the page titled “Find places on the map”, which is under Help/Data/Geocoding/Geocoding with ArcGIS Pro (Figure 1.10).
- Search Engines: When you can’t find what you are looking for in the ArcGIS Pro Help pages, or following the directions on the page for the tool does not give you the correct result, it may be time to search the broader internet. Go to your favorite search engine (Google, Bing, DuckDuckGo, etc.) and try typing in a description of the problem. Make sure you include the name of the software you are using. For example, you might search for “ArcGIS Pro locate tool doesn’t work,” then explore some of the results. These are likely to include the ArcGIS Pro help page for the tool, as well as forums where people have posted questions and answers about the same or similar problems.
- GeoNet, the Esri Community: Sometimes the best answers to problems come from other software users. If you run into a problem with the program, chances are someone else has too! Esri hosts a forum for its community of software users called GeoNet. Access is restricted to ArcGIS Online Organization accounts. If you are signed into your account and still can’t access GeoNet, ask your instructor (or the administrator of your Organization if it’s someone different) to make sure they have enabled Esri access for your account. Just like any online discussion forum, on GeoNet you can write a post, reply to others, and read through previous posts. Before you ask a question about a problem you are experiencing, search for posts that might already contain the answer. Type a question or tool name in the “Search or Ask GeoNet” bar to see a list of matching posts you can view, or click the search icon in the upper-right of the page. If you browse several posts and can’t find the answer to your question, type your question in the “Search or Ask GeoNet” bar, then click the “Ask it” button to start a new post.
When I first encountered the World Geocoding Service problem, I could not find any satisfactory answers in either the documentation or existing GeoNet pages, so I posted my question to GeoNet. It got a quick response from an Esri employee with a workaround for the problem. That fixed it—sort of. The tool still did not load correctly whenever I (or my students) started a new project. Eventually, I worked out the issue with Esri technical support over the phone. It turned out there was a problem with our ArcGIS Online Organization that I could not have fixed myself. The technician was able to reset the organization to enable use of the World Geocoding Service.
Zoom to a set of coordinates.
Geographic coordinates, given in latitude and longitude, are universally used to designate absolute location anywhere on Earth. ArcGIS Pro can zoom to any location based on its geographic coordinates, and will also display the coordinates of the location of the cursor on the map. Review Section 2.2 of the Campbell and Shin text for more information on geographic coordinate systems.
22. Switch the basemap to Imagery or Imagery with Labels.
23. Zoom in on a geographic feature you are interested in until you can see it in the imagery.
24. Move your mouse over the feature and notice the coordinates changing in the center of the bar at the bottom of the Map view, below the actual map (Figure 1.11).

25. On a piece of paper, write down the decimal degree coordinates shown for your feature. You may also wish to bookmark the current map extent, but this is optional.
26. In the Navigate group in the ribbon’s Map tab, click the Full Extent button (which looks like a globe) to zoom out to a view of the entire world.
27. In the Navigate group in the ribbon’s Map tab, click the “Go To XY” button (see Figure 1.5). This brings up a small bar near the bottom of the map for entering coordinates.
28. In the Go To XY bar near the bottom of the map, type in the geographic coordinates you wrote down, in the same order they were displayed (longitude, latitude). Do not use a degree symbol or letter. Enter a negative number for longitude if the hemisphere letter is W, and for latitude if the hemisphere letter is S. Hit the Enter key on your keyboard when done.
29. Zoom the map back in to your feature of interest.
30. In the coordinates bar below the map, click the down arrow to the right of the coordinates, then click “Degrees Minutes Seconds”.
31. Write down the DMS coordinates of your feature on a piece of paper.
32. In the Go To XY bar, click the dropdown menu that says “dd”, then click “Degrees Minutes Seconds”.
33. Zoom the map to the full world extent again (repeat Step 27).
34. Enter the DMS coordinates of your feature in the Go To XY bar. Don’t worry about adding the symbols, but put a space between each number, and add the appropriate hemisphere letter at the end. Hit the Enter key when done.
35. In the Navigate group in the ribbon’s Map tab, click the “Go To XY” button to remove its bar.
Teachback 10
What feature did you choose to locate based on its coordinates? What are its geographic coordinates in DD format and in DMS format?
Further Resources
Additional information about navigating maps and scenes in ArcGIS Pro is available on the ArcGIS Pro Help website Navigation pages.
A representation of map scale as a ratio of distance on the map to distance on the ground.
A link to a specific map scale and centering
A bottom map layer made up of tiled raster images delivered through the internet that provides reference information
The middle point of a geographic feature as defined by the center of the feature's bounding box or the closest point within the feature to that center
A collection of information that describes how a software program or tool functions
