
1.6 Label Features
Labels are an essential component of any map. They name important map features, helping map users understand the purpose and context of your map. Not all map layers need to be labeled, but features that are of particular interest to users who may not know their geography well should be.
Labeling maps can be tricky business. Like map symbols, labels should follow certain mapping conventions. They should be clearly readable, must not interfere with one another, and should be positioned so it is obvious to map users which feature each label refers to. Polygon labels should be placed within polygons that are large enough, while point and small polygon labels should be positioned at one corner of the symbol they reference (not directly in line with or directly above or below the symbol). Line labels should follow the general curve or path of the lines they reference and should never be placed upside-down. In cluttered situations, labels can be displaced with a leader line, or use masks or halos to block out features underneath. With all this to bear in mind, it’s no wonder labeling maps can be a headache!
Fortunately, ArcGIS Pro can do some of this work automatically, using complex algorithms to avoid labels overlapping each other or blocking out too many symbols. However, there are many labeling settings you can adjust, and no matter how much time you spend playing with them, getting the labels set just how you want them can be a bit maddening. ArcGIS Pro provides two different algorithm options: the Standard Label Engine and the more powerful Maplex Label Engine. To keep things simple, this section will only use the Standard Label Engine, and cover only some of its options. Really getting to know your way around labeling in ArcGIS Pro is a matter of reading Esri’s extensive labeling documentation and taking lots of time to experiment in the software.
Although it is not part of the recommended reading for this chapter, labeling is discussed further in Section 9.3 of the Campbell and Shin text.
Section Outcomes
In this section, you will:
- add labels to polygon features,
- adjust the appearance of labels,
- adjust the position of labels,
- label lines,
- label points,
- adjust label priorities and weights, and
- add halos to labels.
 Add labels to polygon features
Polygon features are a good place to start labeling, because placement is fairly simple: labels should float around the center of each area symbol.
1. In the Contents pane, uncheck the check boxes for the point and line layers, leaving only the polygon layer visible.
2. Click on the polygon layer name in the Contents pane, then click the Labeling ribbon tab (Figure 1.22).

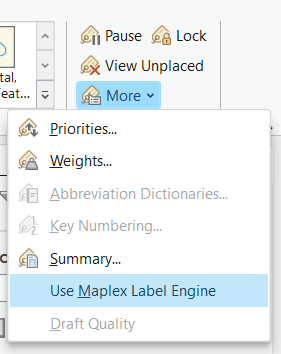
3. In the Map group on the far right side of the Labeling ribbon tab, click the “More” button, and make sure “Use Maplex Label Engine” is unchecked (Figure 1.23). If it is checked, uncheck it, and click “Yes” in the Switch Label Engine prompt.
4. On the far left side of the Labeling ribbon tab, click the “Label” button, which looks like a paper label with a checkmark next to it (see Figure 1.22). Depending on your computer, rendering labels may take a minute. Be patient.
5. In the Label Class group of the Labeling ribbon tab, observe what is in the “Field” dropdown. Try changing this dropdown to a different value and observe the results on the map.
6. Reset the “Field” dropdown to its original value, or click the Undo button on the Title Bar.
![]() Teachback 19 – Perception and Interpretation
Teachback 19 – Perception and Interpretation
- What was the default value of the “Field” dropdown on the Labeling ribbon?
- What happened when you changed it?
- What does the “Field” dropdown determine?
Adjust the appearance of labels
Good map makers don’t just accept software defaults when it comes to labels. Think carefully about how you want your labels to look. There are some mapping conventions to pay attention to here. The labels have to be big enough to read; typically that’s at least 6 point font size for printed maps (though 8 point plus is better) and 10 point font size for maps that will be viewed on screens. Labels for natural features often use italicized labels and/or serif fonts, while cultural features are usually not italicized and often use sans-serif fonts. Labels may also be colored like the symbols they reference, such as blue for water features or green for parks. When in doubt, look up other maps that show features similar to yours and observe how those map makers labeled their maps.
7. In the Text Symbol group of the Labeling ribbon tab, adjust the typeface, font style, and color (if desired) of your labels to make them consistent with mapping conventions for the type of features your polygons represent. Change at least one of these three settings from the labeling defaults.
8. In the same place, adjust the font size to allow as many labels as possible to be positioned on the map while making them as readable as possible.
9. Save the project.
![]() Teachback 20 – Perception and Interpretation
Teachback 20 – Perception and Interpretation
What typeface, font style, color, and size did you choose for your labels? Why?
Adjust the position of labels
10. Click the expand button (the small box with an arrow) in the lower-right corner of the Label Placement group of the Labeling ribbon tab to open the Label Class pane. This pane gives you many more options for adjusting labels.
11. In the Label Class pane, make sure both the “Position” tab and the Position icon (a box with a point in the middle) are selected (Figure 1.24).
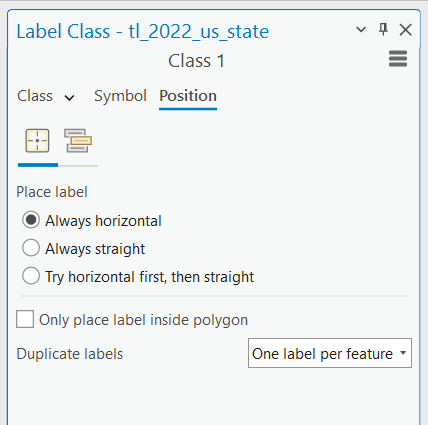
12. Try each of the three radio button options under “Place label” (“Always horizontal”, “Always straight”, and “Try horizontal first, then straight”), the checkbox option (“Only place label inside polygon”), and the “Duplicate labels” dropdown options to see what each does to your polygon labels.
13. In the Label Placement group of the Labeling ribbon tab, try each of the three options, and observe how both the labels on the map and the settings in the Label Class pane change.
14. In the Label Class pane, click the Conflict Resolution icon (a stack of three rectangles; Figure 1.25).
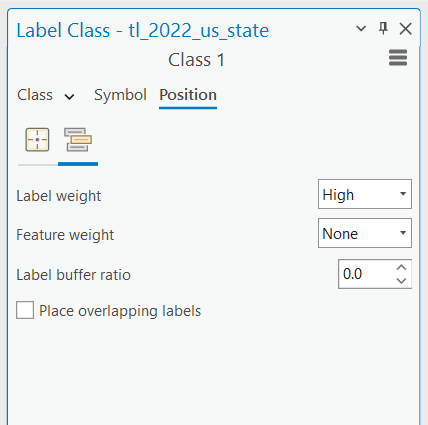
15. Increase the number in the “Label buffer ratio” input with the up arrow or by typing a number and observe its effect on the map labels. Choose a buffer ratio that produces a result you like or return it to 0.
16. Check the “Place overlapping labels” box, observe what it does to the map labels, then uncheck it.
17. Click the Position icon again and choose the label placement settings that produce the best result for your map.
18. Save the project.
![]() Teachback 21 – Perception and Interpretation
Teachback 21 – Perception and Interpretation
- In full sentences, describe what each of the three “Place label” options and the “Only place label inside polygon” option (from Step 12) do to the map labels.
- In a full sentence, describe what the label buffer ratio (from Step 15) does.
- What is the problem with placing overlapping labels?
Label lines
Now that you have your areas labeled, it’s time to try your hand at labeling lines. Your options for line label position and appearance are similar to those for polygons, but specific to line labeling conventions. Again, look up and refer to existing maps for guidance on how to design and place your line labels.
19. In the Contents pane, check the checkbox for the line layer, and click on the line layer name to highlight it.
20. On the far left of the Labeling ribbon tab, click the “Label” button to add line labels.
21. In the Label Class group of the Labeling ribbon tab, make sure the “Field” is set to display the feature names as labels.
22. In the Text Symbol group of the Labeling ribbon tab, adjust the typeface, font style, size, and color of the line labels.
23. In the Label Class pane Position tab, adjust the label position properties as needed.
24. Save the project.
![]() Teachback 22 – Perception and Interpretation
Teachback 22 – Perception and Interpretation
- What label appearance and position properties did you adjust for your line features? What do your final line labels look like?
- How does the presence of your lines and their labels on the map affect the labels for your polygon features?
Label Points
25. Repeat the steps you performed for the other two layers to label the points layer.
26. When you are satisfied with your point labels, save the project.
![]() Teachback 23 – Perception and Interpretation
Teachback 23 – Perception and Interpretation
- Does every point have a label?
- When all three layers are labeled, which layers, if any, have features that are missing labels?
- Which layers, if any, have labels that overlap or run into each other?
Adjust priorities and weights
When a map has a lot of labeled features, ArcGIS Pro’s algorithm simply cannot place all labels without some overlapping each other and underlying symbols. To maintain legibility, the software assigns each layer a label priority to determine which labels take precedence for positioning (pushing aside lower-priority labels), and label and feature weights that determine whether certain labels can or cannot overlap certain features. You can adjust these values for more control over how your labels look on the map.
27. In the Map group on the far right side of the Labeling ribbon tab, click the “More” dropdown, then click “Priorities…”.
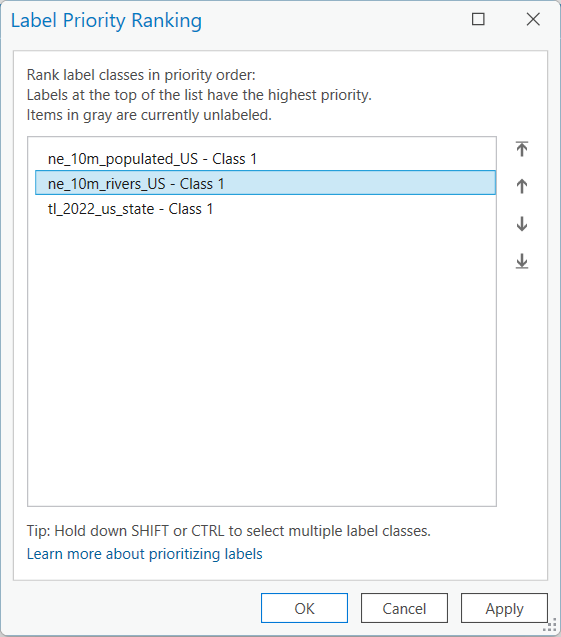
28. In the Label Priority Ranking window, experiment with reordering the layers using the arrow buttons on the right side (Figure 1.26). Click the “Apply” button each time you change the ranking to observe how map labels change while keeping the ranking window open.
29. When you have determined which ranking produces the best label positions on the map, click the “OK” button to apply the ranking and close the Label Priority Ranking window.
30. In the Map group on the far right side of the Labeling ribbon tab, click the “More” dropdown, then click “Weights…”.
Notice that in the Feature Layers tab of the Label Weight Ranking window (Figure 1.27), each layer is assigned a Feature Weight and a Label Weight (actually, each row of the table represents one label class; since we are only maintaining one label class per layer, each row effectively represents a layer). Feature weights apply to the feature symbols for each layer, while label weights apply to each layer’s labels.
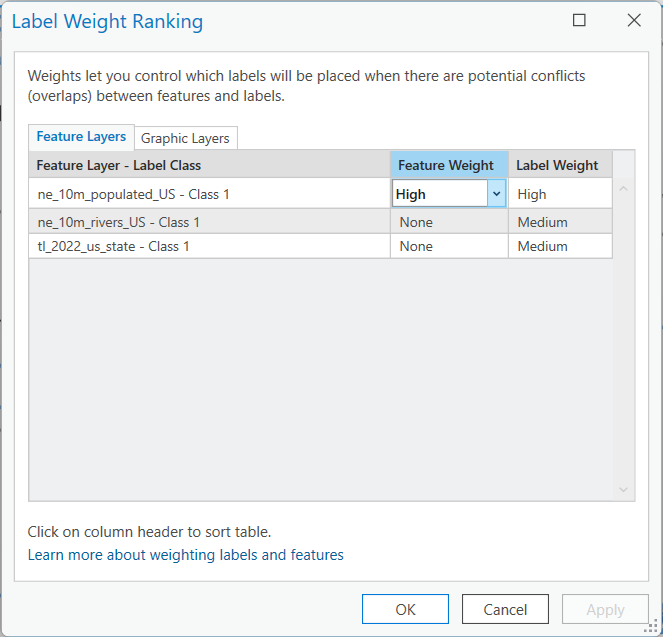
The rule used by the algorithm is that nothing can be overlapped by something with an equal or greater weight. So, for instance, if your line features are given a weight of “Low” and your point labels are weighted “Medium”, the point labels may overlap the line symbols; however if both are assigned “Medium”, no point labels will touch any line symbols. If you don’t want any of your labels to run into each other, it’s best to give all layers the same Label Weight.
31. In the Label Weight Ranking window, adjust the weights of each layer’s features and labels. Click on the “Apply” button each time you adjust a weight to see the effect on the map labels while keeping the ranking window open.
32. When you have determined which ranking produces the best label positions on the map, click the “OK” button to apply the ranking and close the Label Weight Ranking window.
33. Save the project.
![]() Teachback 24 – Evaluation
Teachback 24 – Evaluation
Write a paragraph explaining what label priorities and weights you chose for each layer and your reasoning behind those decisions.
Add halos to labels
Labeling is about compromise. Rarely do you find many totally blank spots on the map to place labels where they will have no interference from symbols underneath. However, once you have chosen the best possible positions for your labels, you can increase their legibility by using effects that block out parts of the underlying features. The easiest and most commonly used label effect is adding a halo, or a neutral-color border around the label.
34. In the Contents pane, select the layer whose labels you want to add halos to first.
35. In the Label Class pane, click the “Symbol” tab. Alternatively, click the expand button in the lower-right corner of the Text Symbol group in the Labeling ribbon tab.
36. In the Symbol tab of the Label Class pane, make sure the General icon (letter “A” with a paintbrush) is selected, and click on “Halo” to expand its options (Figure 1.28).
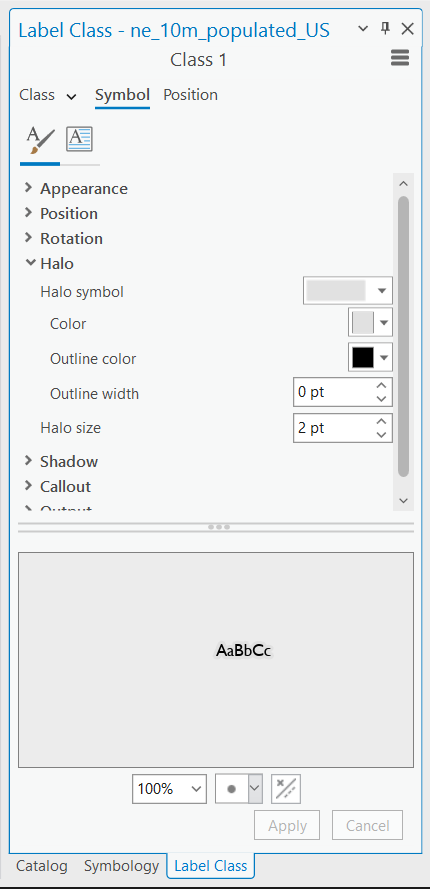
37. Click the dropdown to the right of “Halo symbol” and select one of the Polygon symbols.
38. Use the “Color” dropdown to choose a neutral background color that will blend in with the fill color of your polygon area symbols.
39. Leave “Outline width” set to 0 pt, and increase “Halo size” to at least 1 pt.
40. Click the “Apply” button to apply halos to the labels on the map.
41. Adjust the Halo settings for the selected layer to your liking, clicking the “Apply” button each time you make an adjustment.
42. In the Contents pane, select the next layer whose labels you want to apply halos to.
43. Repeat the procedure in Steps 37-41 to set halos for that layer.
44. Repeat the halo setting process for the final layer and adjust the halos for all three layers until you are satisfied.
45. Save the project.
![]() Teachback 25 – Evaluation
Teachback 25 – Evaluation
- What do you think is most difficult about labeling?
- Is there anything that you wish you could do but found you couldn’t? If so, what?
- Which label settings did you find most useful?
Further Resources
Additional information about labeling in ArcGIS Pro is available on the ArcGIS Pro Help website Text pages.
Commonly used map design strategies that aid comprehension by being familiar to map users
A thin line that visually connects a label or callout to the symbol(s) it references
A gap or hole in an underlying symbol that borders another symbol or label, improving legibility
A border around label text that blocks underlying symbols and labels, improving the label's legibility
The order in which labels are drawn and take position preference on a map
Values that determine which labels and features may be overlapped by labels belonging to a particular label class
A group of labels belonging to a subset of features in a layer that are assigned a particular set of properties
