
1.7 Create a Layout
The Map View in ArcGIS Pro is designed to be a dynamic, interactive representation of the included feature layers. It allows you to easily navigate the map and work with your data on the computer. However, it does not really show you what the map will look like it when you print it or export it as a static image.
In order to preview the map and set its parameters for printing and export, a layout is required. A layout is a view of the page to be printed or image canvas to be exported. It allows you to see how your map and any associated elements (title, legend, etc.) will look in the final document. ArcGIS Pro lets you create multiple layouts for a given project, and add zero or more maps to a layout. This allows for a great deal of flexibility in the design of your project outputs.
Section Outcomes
In this section, you will:
- create a layout for the map,
- add a map frame to the layout,
- adjust the map frame size and position,
- adjust the map frame appearance, and
- adjust the map scale and centering.
 Create a layout for the map
The first step to creating a map layout in ArcGIS Pro is to insert a new blank layout. You can think of this as a bit like the page preview in a Microsoft Word document. You will add and arrange the map and associated elements on this page.
Before you insert your layout, choose a size and orientation based on your map’s geography. The most common printed page size in the U.S. is 8½” x 11”, but many larger desktop inkjet printers can handle pages up to Tabloid size (11” x 17”), which allows for a larger map with less clutter. If you are elsewhere in the world, use an ISO size. For orientation, if your geography is wider than it is tall and your map will stand on its own, choose a landscape orientation. If your geography is taller than it is wide, or your map will be embedded in a multiple-page report, choose a portrait orientation.
Teachback 26
What page size and orientation will you use for your Layout? Why?
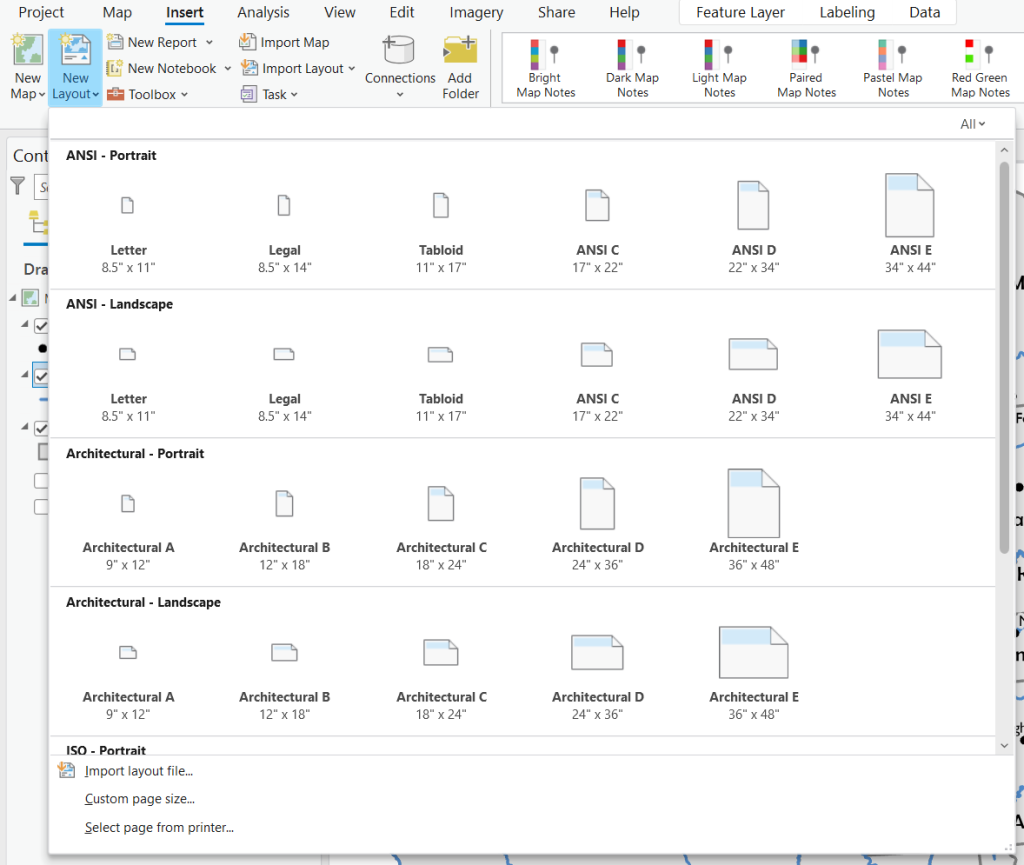
1. Click the Insert ribbon tab.
2. In the Insert ribbon tab, click the “New Layout” button.
3. Choose your desired page size and orientation from the dropdown list of page layouts (Figure 1.29).
Add a map frame to the layout
A new layout is blank until you add the map and other elements to it. Adding a map links it to the layout. Keeping the map and layout separate but linked allows a single project to include multiple maps and multiple layouts, with the possibility of multiple maps (or no map) on a single layout.
4. In the Insert ribbon tab, click the “Map Frame” button.
5. In the dropdown, choose the tile for your bookmark of the full map extent (Figure 1.30).
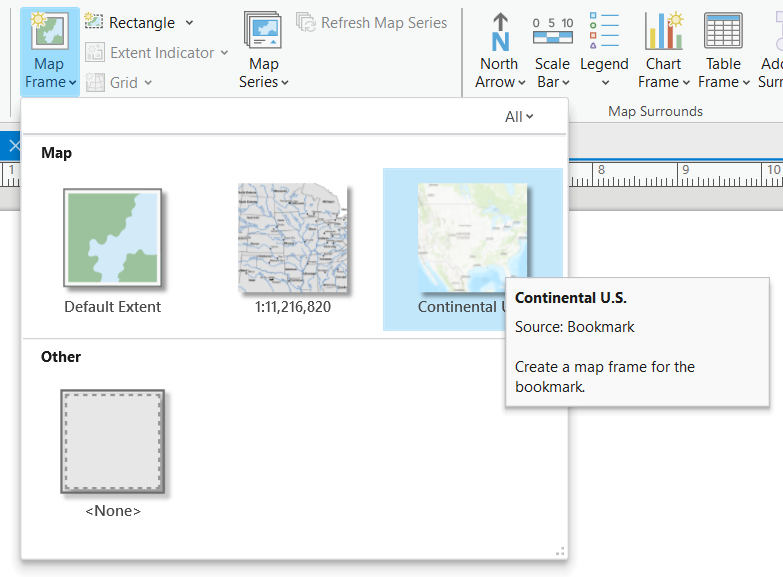
6. In the Layout View, click near the top-left corner of the page, then hold your left mouse button down and drag toward the bottom-right corner. Let go of the mouse button to place the map frame.
Adjust the map frame
Our eyes are drawn to symmetry. It is good practice to center or otherwise consciously position your map frame on the page, and leave even margins around the sides of the page. You may also wish to leave space for a title above the frame, or plan to simply include the title within the map frame.
7. With “Map Frame” selected in the Contents pane, click the Map Frame ribbon tab.
8. In the Current Selection group of the Map Frame ribbon tab, click the expand button to open the Element pane. Alternatively, right-click “Map Frame” in the Contents pane, then click “Properties”.
9. In the Element pane, click the Placement icon (the right-most icon, which looks like a page with measurement bars; Figure 1.31).
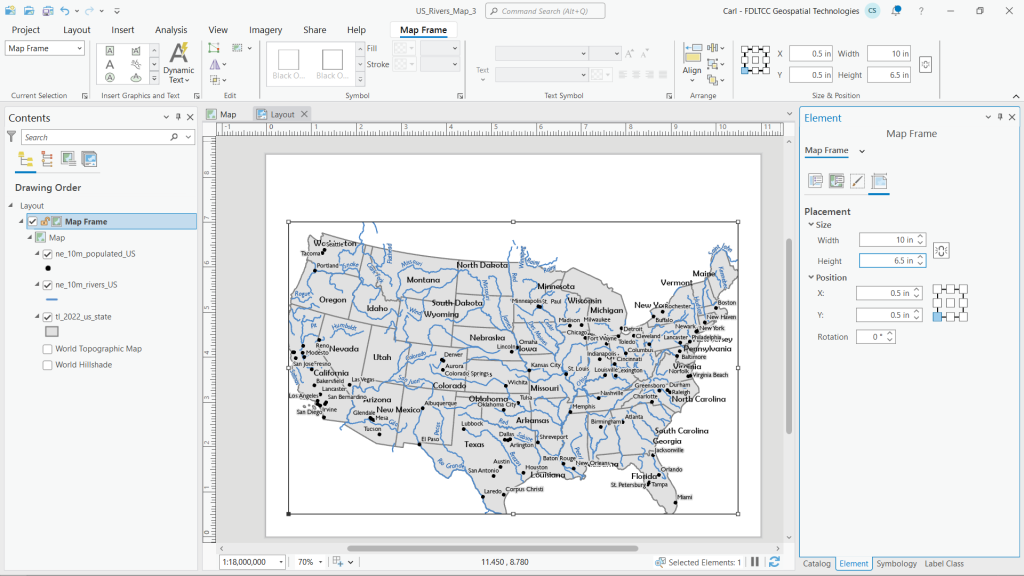
10. Under “Placement”, type in size dimensions and an X and Y position that work together to center the map and provide even margins of at least ½” on each side and a wider margin for the title if desired. The dimensions in Figure 1.31 provide an example, but your numbers will depend on your page size and map geography. The important thing is that the map frame should be evenly balanced on the page.
11. In the Element pane, click the Display icon (which looks like a dotted box with a paintbrush; Figure 1.32).
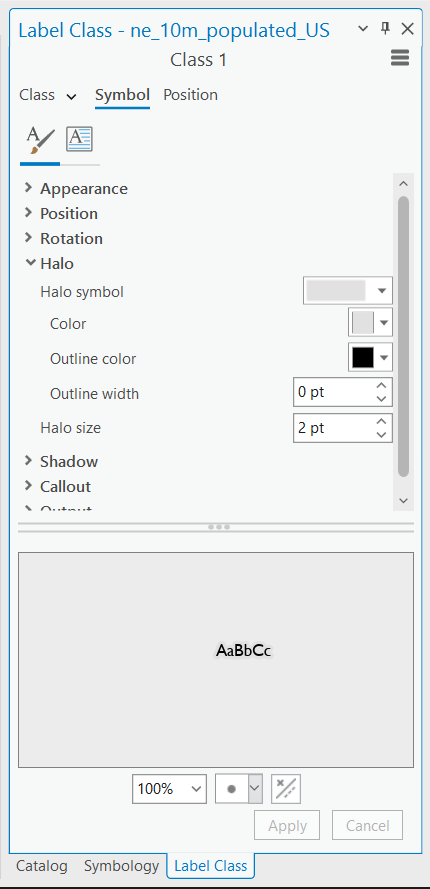
12. Under “Display”, either increase the width of the Border line to at least 2 point, or change the color to “No color” to remove the frame.
13. If desired, give your map a Background and/or Shadow. (Caution: most maps look better without a background color!).
![]() Teachback 27 – Evaluation
Teachback 27 – Evaluation
- What values did you use for your width, height, X, and Y? Why did you choose these values?
- How did you adjust the appearance of the map frame? Explain why you made these choices.
Adjust the map scale and centering
Adjusting the map frame can shift your map. Before you move on, it’s important to set the map scale and centering just how you want it to look in the frame, so you can position other elements around your map. ArcGIS Pro does not let you edit the map within the Layout View unless you consciously choose to do so. However, you cannot just switch back to the Map View to set your map’s position, since you need to see it relative to the map frame and other elements on the layout page.
To edit the map position in the Layout View, you must activate the map. This locks the other elements in the layout, so you will only be able to work with the map. Once you are done, you must close the map’s activation to regain control over the layout. This distinct separation of editing between the map and layout helps avoid accidentally mucking up the map’s appearance while editing layout elements, and vice-versa.
14. In the Layout ribbon tab, click the “Activate” button.
15. With the “Explore” button active in the Map ribbon tab, carefully zoom and pan the map to adjust its scale and centering in the map frame.
16. To more finely adjust the map scale, in the representative fraction input at the bottom-left corner of the Layout View, type a rounded number that is slightly higher or lower than the current denominator, then hit the Enter key on your keyboard.
17. When satisfied, click the back arrow or “Layout” link at the top of the Layout View to close the map activation. Alternatively, click the Layout ribbon tab, then click the “Close Activation” button.
18. Save the project.
![]() Teachback 28 – Perception and Interpretation
Teachback 28 – Perception and Interpretation
- What is the final representative fraction scale of the map in the layout?
- If you switch back to Map View (click the Map tab at the top of the Center View), then enter the same representative fraction scale as the layout’s map frame, how does the map look there in comparison to in Layout View? Why are they different?
- If you zoom the map to a different scale and centering in Map View, what happens to the map in Layout View?
Further Resources
Additional information about creating and modifying a layout is available on the ArcGIS Pro Help website Layouts pages.
An arrangement of a map and associated elements on a page
