
Personal Computer Basics
- Comparing and Contrasting Personal Computers
- Identifying Computer System Components
- Classifying Various Peripheral Devices
- Creating Screenshots
- File Management
- Useful Keyboard Shortcuts
Comparing and Contrasting Personal Computers
Computers were originally created for military, scientific, government and corporations – organizations with one common characteristic – large budgets! Fortunately, since the early days of computing, computers have simultaneously become more user-friendly and affordable giving rise the era of personal computing.
In 1977 Steve Wozniak and Steve Jobs debuted the Apple-II personal computer. However, it wasn’t until the early 1980’s that IBM introduced their personal computer (PC), and the personal computing era really became legitimate.
Personal Computers (PCs) are best described as small, inexpensive computers designed for individual use. Each of the following are examples of personal computers:
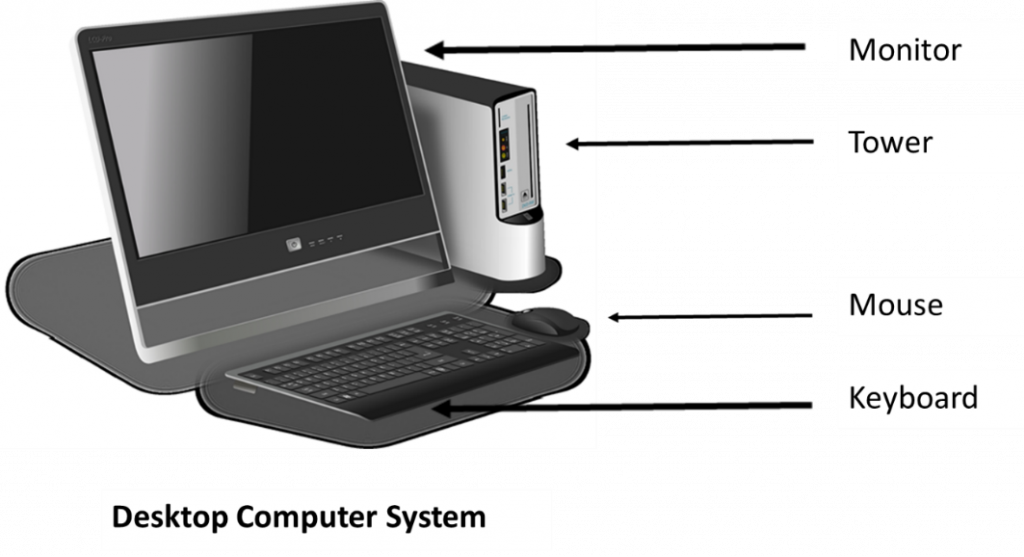
- Desktop computers – designed to utilize a consistent source of electric power, these computers fit on or beneath a desk, and therefore are not intended to be portable. Most desktops contain several peripheral input and output devices intended to extend the computing functionality.
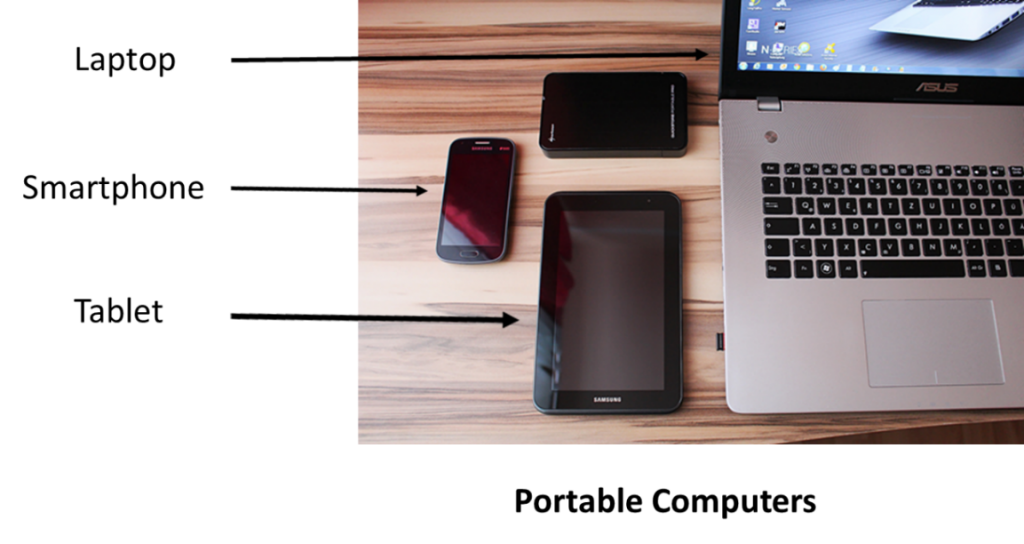
- Laptop and Notebook computers – portable computers that utilize a battery for power. Consist of a separate display screen and keyboard in a single unit. Contains a hinged lid that closes the screen onto the keyboard for easy portability. Some screens are touch-activated displays.
- Tablets – thin mobile computers with touchscreen displays. Typically, larger than smartphones, tablets are ideal for reading eBooks, surfing the Web, and watching videos.
- Smartphones – pocket-sized mobile phones that combine voice, text, e-mail and personal computing into a single device that can access the Internet and run a variety of third-party software components, known as apps.
Modern desktop and laptop computers are generally either PCs, usually running a Microsoft Windows version operating system, or Apple Macintoshes, which run Apple’s proprietary operating system (OS) software. Various versions of the Linux OS also represent a relevant share of desktop and laptop users on a PC platform. However, according to several industry analysts, Microsoft’s Windows is the dominant OS in terms of shares of users, with estimates of more than half of all users in 2016.
The most popular mobile (tablets and smartphones) operating systems are Android (developed by Google), iOS (developed by Apple) and Windows 10 Mobile (developed by Microsoft).
Identifying Computer System Components
Computer systems consist of hardware and software. Hardware is the tangible, physical components of a computer, while software is the intangible programs that function on a computer. Basic hardware components include a hard drive for storing data, a processor for performing operations, memory for holding active data, and a 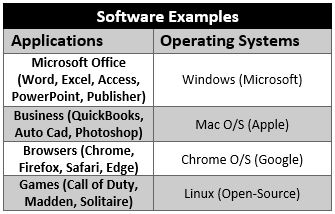 motherboard to tie the parts together. Even gaming consoles are considered computer hardware. Software includes computer programs, libraries and data. Software can be categorized as application (most programs), system (operating, utilities and device drivers) and malicious software, or malware (undesirable programs that results in harm or disruption).
The four main components of a computer system are input devices, output devices, processing devices and the storage devices used to store data within the computer system. The flow of data through a computer system begins with either an input device that enters data into the central processing unit which then sends the data to an output device as information. Alternatively, data can be retrieved or sent to a storage device from the processor.
Hardware and software work together to process data. When you open a software program, the computer reads its data from the hard drive or input device, runs the software on the computer’s processor and then displays the results on your output device or saves the data to a storage device.
Classifying Various Peripheral Devices
Hardware components that are not an integral part of the central processing unit are often referred to as peripheral devices. Peripheral devices connect with a computer through several I/O interfaces, such as communications (COM), Universal Serial Bus (USB), firewire, and serial ports. Peripherals are usually used for either input, storage or output.
Input Devices
An input device is any device that provides input to a computer. There are many input devices, but the two most common ones are a keyboard and mouse. Every key you press on the keyboard and every movement or click you make with the mouse sends a specific input signal to the computer. Examples of commonly used input devices include:
-
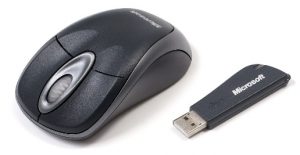
Wireless mouse Mouse: a small object that you can roll along a hard and flat surface which serves as pointing device to enable the user to control the movement of the cursor on a screen display. Most mice have two or more buttons which allow the user to scroll and click objects on the screen.
- Keyboard: desktop and laptop computers have external and built-in keyboards that resemble a traditional typewriter. Most keyboards are designed to have the QWERTY layout of keys which make keyboarding easy and consistent across various devices. Many keyboards have function keys as the top row that perform special shortcut functions.
- Touchscreen: the primary input device for tablets and smartphone, this technology combines the functionality of a mouse and a keyboard by allowing a finger or stylus to make gestures or select on-screen menus and keys.
- Microphone and Camera: used to record and capture sound and images, and to communicate with others using audio and video conferencing software. Most portable computers have these devices built-in, but external devices are typically a higher quality.
Many input devices operate without cords. Wireless mice and keyboards require receivers to collect the electronic signals transmitted by the input devices. Bluetooth devices use short-range radio waves to communicate between paired devices and computers. Other, input devices include scanners, bar code readers, joy sticks, light pens, trackballs, magnetic ink character recognition (MICR) and optical character recognition (OCR) software. Warning! Excessive use of a computer can lead to repetitive motion injuries such as carpal tunnel syndrome, and other computer-related health problems, including computer addiction. Take frequent breaks, stretch properly, and utilize ergonomically designed input devices to reduce the threat of these injuries. Limit your time online, and connect face-to-face too!
Output Devices
An output device is any hardware peripheral that disseminates processed data. The processed data, stored in the memory of the computer is sent to the output device, which then converts it into an understandable form. Examples of commonly used output devices include:
- Monitors: older monitors typically contain a cathode ray tube, which result in a heavy display, which is also an inefficient use of power and your desktop footprint compared to flat screen monitors. A flat panel display uses an LCD (Liquid Crystal Display), although some use plasma technology. Screen size is measured diagonally across the screen, in inches. The entire screen area may not be usable for image display. The resolution of the monitor is the maximum number of pixels it can display horizontally and vertically (such as 800 x 600, or 1024 x 768, or 1600 x 1200). Most monitors can display several resolutions below its maximum setting. Pixels(short for picture elements) are the small dots that make the image displayed on the screen. A video card is necessary for generating complex computer graphics on a monitor.
-
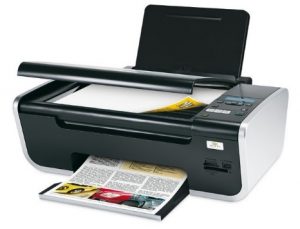
Multi-function printer Printers: want a “hard” copy of a document versus a “soft” copy of a file? A printed output is referred to as a hard copy versus an electronic or soft copy of a file. Printers come in various formats. Popular for home computing is ink jet printers. These printers form the image on the page by spraying tiny droplets of ink from the print head. The printer needs several colors of ink (cyan, yellow, magenta, and black) to make color images. Some photo-quality ink jet printers have more colors of ink. Unfortunately, ink cartridges are expensive to replace, so the cheap initial cost of ink jet printers is offset by frequent printing usage. Conversely, laser printers utilize toner to burn tiny plastic particles of pigment onto paper. While the initial cost of laser printers can be expensive, they produce a higher quality output and are less expensive and faster than ink jet printers in the long run. Other printers include dot-matrix which use impact and inked ribbon on continuous feed paper. These are (were) popular for multi-layer forms. Lastly, multi-function printers are popular for home office/small office computing because they combine printing, faxing, copying and scanning in a single device.
- Speakers: Audio output requires a sound card and internal or external speakers or headphones.
-
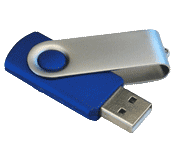
Flash drive Storage devices: While primary storage is the internal CPU’s RAM, secondary storage consists of external hardware such as CDs, DVDs, flash drives and external hard drives. Obsolete secondary storage examples include floppy disks, magnetic tape, punch cards and zip drives. A popular alternative to physical secondary storage is cloud storage which stores data on remote servers accessed from the Internet, or “cloud”, which is maintained by a cloud storage service provider built on virtualization techniques.
-

Wearable computer device Hybrid peripherals: Wearable computer devices, such as augmented reality goggles, smartwatches and fitness trackers can all be lumped into this auxiliary device category.
Creating Screenshots
One of the first steps to securing assistance with computer-related issues requires sharing the error or screen output with a teacher or technical support staff. Often, these support resources are not available to view the screen in-person. Therefore, capturing the screen output is a vital skill to help resolve computer issues. Screenshots, also known as screen captures, screen grabs, or print screens, are the technical terminology assigned to this piece of data. A screenshot is a digital image of what appears on a computer or television screen. Producing a screenshot can be a confusing task, which should be broken down into two parts. The first part is the capturing of the screen image, while the second part is the process of pasting the capture into a storable file. There are numerous methods of capturing a screenshot, and they vary from one computer device to another due to operating system versions and keyboard differences.
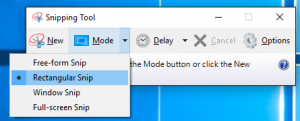
The most consistent method for Windows users to create screenshots is by utilizing the Windows Snipping Tool. As of late 2018, the new tool is called Snip & Sketch. Most images in this documentation have been generated with the help of these tools. To open the Snip & Sketch tool, select the Start button, type “snip” in the search box on the taskbar, and then select the
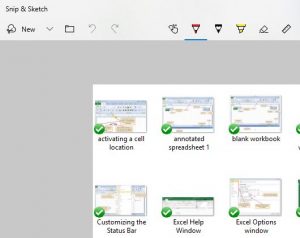
Snip & Sketch app from the list of results. In addition to capturing a full-screen snip, the Snip & Sketch Tool provides the convenience of capturing a more specific “snip” of data by using the mouse to draw a rectangular or free-form block of specific data to be captured. This allows for more focused data to be collected versus an entire screen of potentially competing images. Once the drawing is selected, the screenshot should automatically open in a new window. You can modify the screenshot by cropping, highlighting annotating or drawing on the image. This image can then be pasted into a new program (similar to how the above image was added to this document) or saved as a separate file to be stored on a permanent or cloud storage device. The Snip & Sketch tool also be set to a timer to take a screenshot in three or ten seconds. To take a screenshot with Snip & Sketch, just press PrtScn. Screenshots will be quite useful for providing feedback or asking questions to/from students/teachers, particularly in distance education environments.
File Management
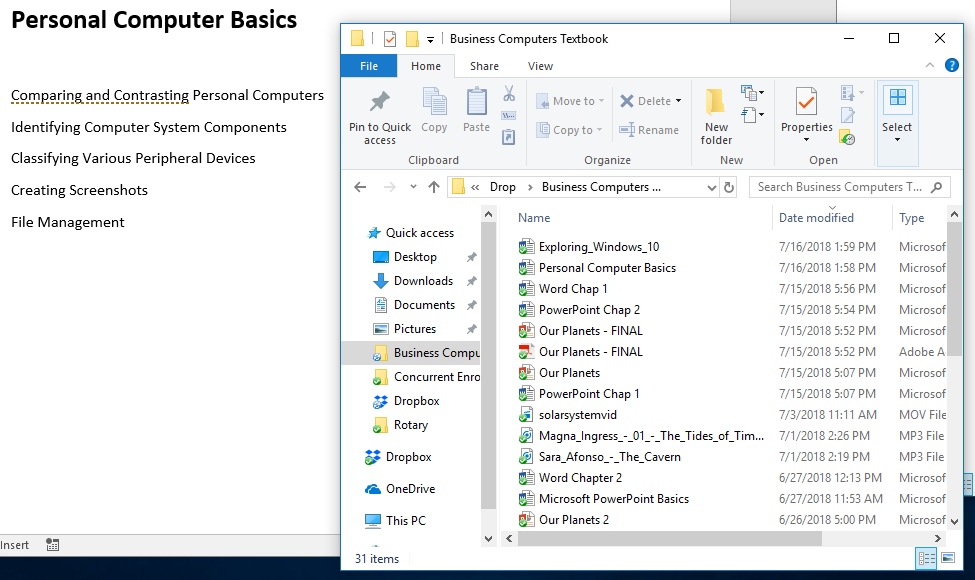
One of the many attributes of being a successful college student is evidence of time management, communication, and organization skills. Managing the files on a computer is essential to excel at all of these skills. Almost all courses require a computer to access and communicate information. The inability to locate a file on a computer or course management system (like Brightspace D2L or Blackboard) could result in a late or missing assignment, missed conversations with an instructor or classmate, and/or tremendous stress. The primary solution to enhanced computer organization skills is through increased knowledge of Windows’ File Explorer tool (formerly known as Windows Explorer).
File Explorer displays the hierarchical structure of files, folders, and drives on your computer. All data, including applications, program files, etc. is stored on the computer’s disk (also known as disk drive). The primary internal hard drive is known as the C: drive. The contents of a disk are organized into individual files within individual folders. The Document folder is a general storage location for files created in programs like Microsoft Office, whereas photos downloaded from the Internet or a camera are typically stored in the Pictures folder. The Quick Access section displays frequently used folders and files, whereas the This PC view displays information regarding the computer’s storage capacity, and attached storage devices, including optical media.
To access the computer’s files, click Start > File Explorer or select the File Explorer icon located in the taskbar. Upon launching File Explorer in Windows 10, the Quick access window will open. Previously known as “Favorites” in previous versions of Windows; this is where users will see their most frequently accessed folders and files that have been created.
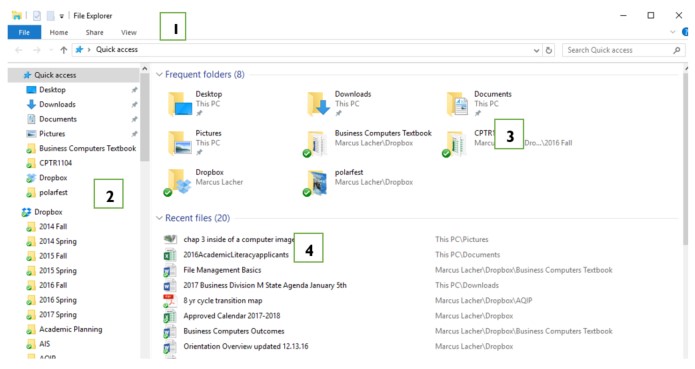
The File Explorer window can be broken into the following sections:
- File Explorer ribbon. This is similar to the ribbon you will find in most Microsoft Office applications. The ribbon contains buttons for common tasks to perform on your files and folders, such as copying, pasting, moving and renaming files and folders. A recommended feature is the View menu which allows you to view your files via icons, tiles, a list or the underappreciated Details view.
- Navigation Pane. Vertically scroll through this pane to access commonly used drives and folders. You can also access your Downloaded files, Documents, and external storage devices, as well as other libraries, such as pictures and music.
- Frequent folders. This displays the folders you’ve worked with recently to allow for quick access.
- Recent files section. Similar to the Frequent folders section, this area displays the files and documents that you’ve recently opened.
The Search box is an underappreciated tool to help find files that can’t be found in their presumed location. Use the asterisk (*) wildcard character to expand the search results. i.e. Plane* will find files with the words plane or planet, and more. The File Explorer contains an array of tools which can help manage files and stay organized!
Creating a custom hierarchical structure of folders for each semester and each course is considered a best practice for organizing college data. For example, create a folder with the name of the current semester, i.e. 2018 Fall. Within this folder, create subfolders for each course, i.e. MIS1100. Descriptive folders and file names also diminish confusion when trying to find files on a computer disk.
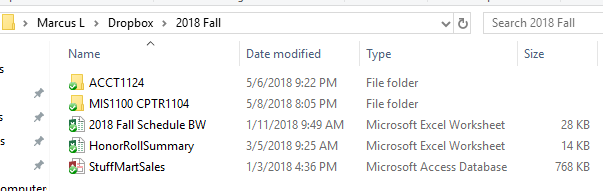
File Explorer is the primary tool for copying, moving, renaming and searching for files and folders. The View tab provides display and sorting options for files and folders. Viewing files using the Details layout allows for quick sorting by simply clicking a column header to toggle between ascending and descending order. The sort order in the above illustration is sorted by Name in ascending order. Clicking the File name extensions checkbox helps identify the source program for each file, particularly if the Type column is not displayed. Perhaps the most useful column is Size, which can be helpful to determine if a file is too large for distribution via e-mail or portable storage methods.
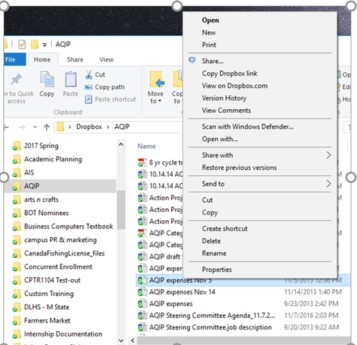
One of the most common operations for users is copying files, which creates a replica of an original file. To copy a file, select the file you want to copy and click Copy under the Home tab. Moving a file necessitates substituting the Copy button with the Cut button. Moving a file saves hard drive space by not creating a duplicate file. To add a new folder, right click and choose New > Folder from the Shortcut menu. Conversely, to delete a file or folder, right-click the object and choose Delete from the shortcut menu.
Useful Keyboard Shortcuts
- Windows key + E – open a new instance of File Explorer from anywhere in Windows.
- Alt + P – show or hide the Preview pane.
- Alt + Shift + P – show or hide the Details pane.
- Alt + left arrow key – go back one folder in your history.
- Alt + up arrow key – go up one folder in the folder tree.
- Ctrl + N – open a new File Explorer window.
- Ctrl + E – activate the Search bar.
- Ctrl + Shift + N – create a new folder in the current folder.
- Ctrl + mouse wheel up or down – increase or decrease the size of icons and thumbnails.
